
AFFILIATE DISCLAIMER: This page contains some affiliate links, which means we may receive a small commission if you purchase through our links (at no extra cost to you). We only recommend companies that we have personally used, love, and trust. For more information please check out our disclosure policy HERE!
Get ready to view our fabulous farmhouse kitchen makeover, we’re so excited to show you everything!
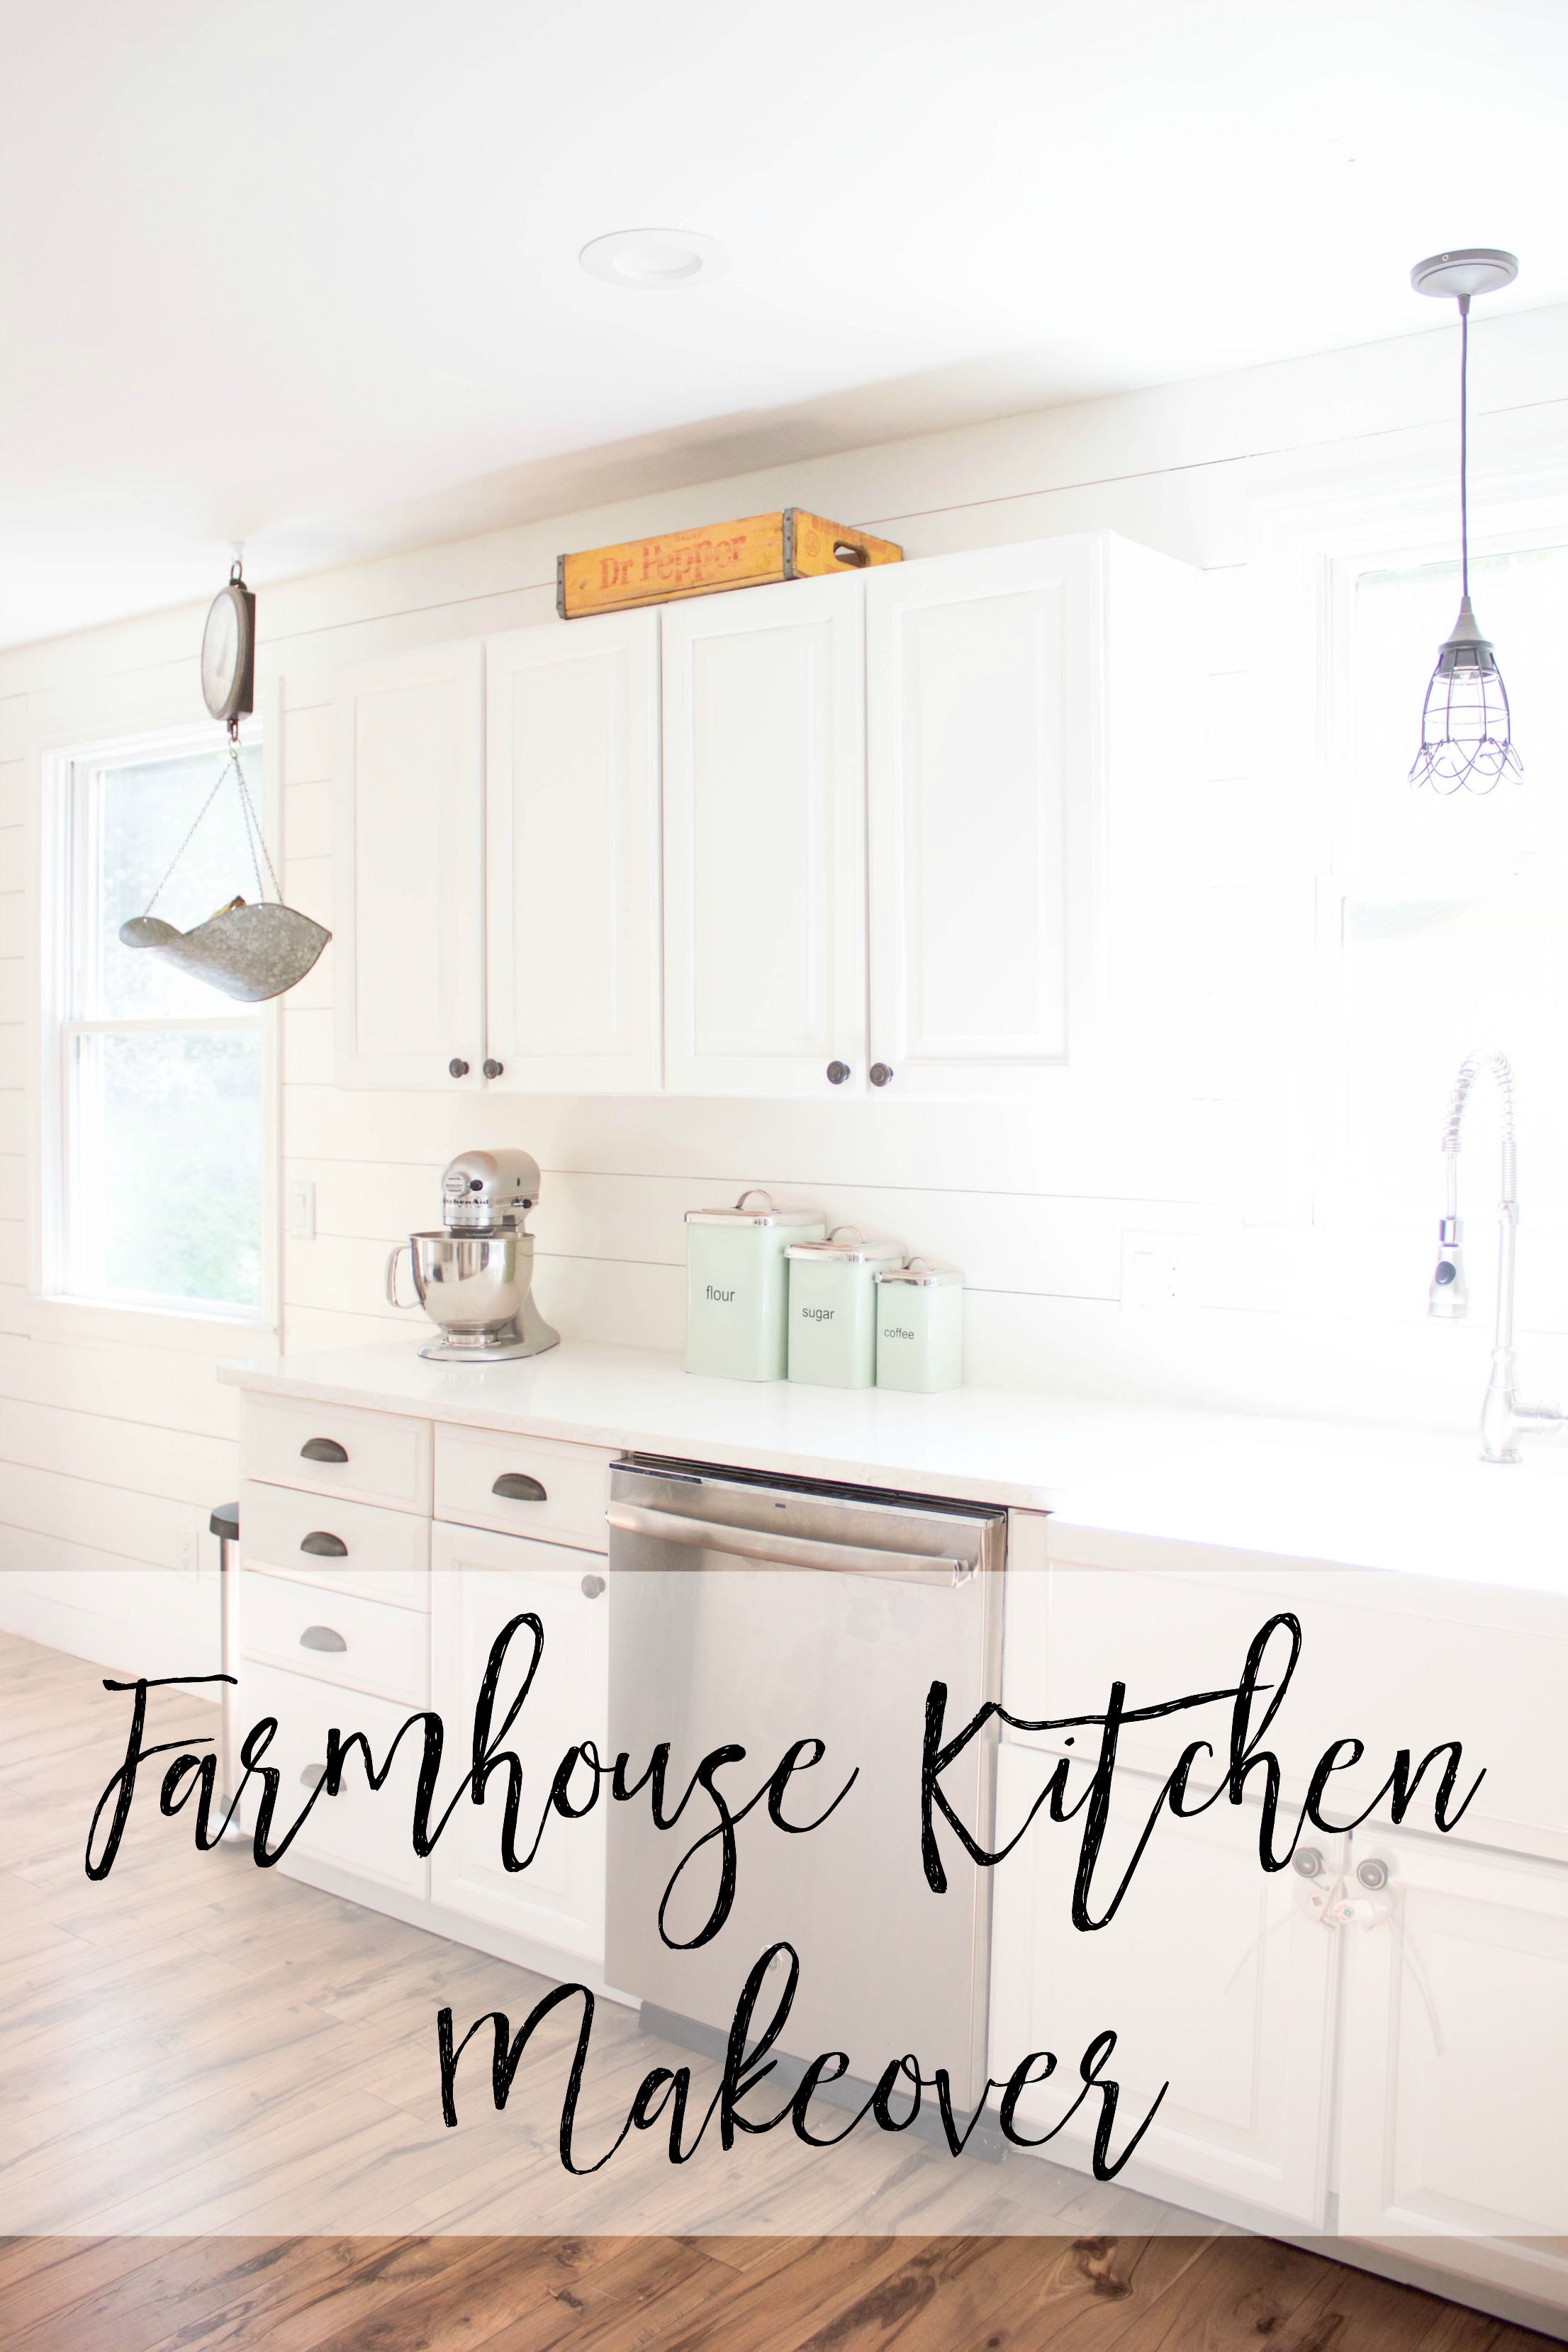
It’s been a long time coming, but our kitchen is finally complete! Today I’m sharing with you all of the details that went into our farmhouse kitchen. But first let’s take a look at the before photos.
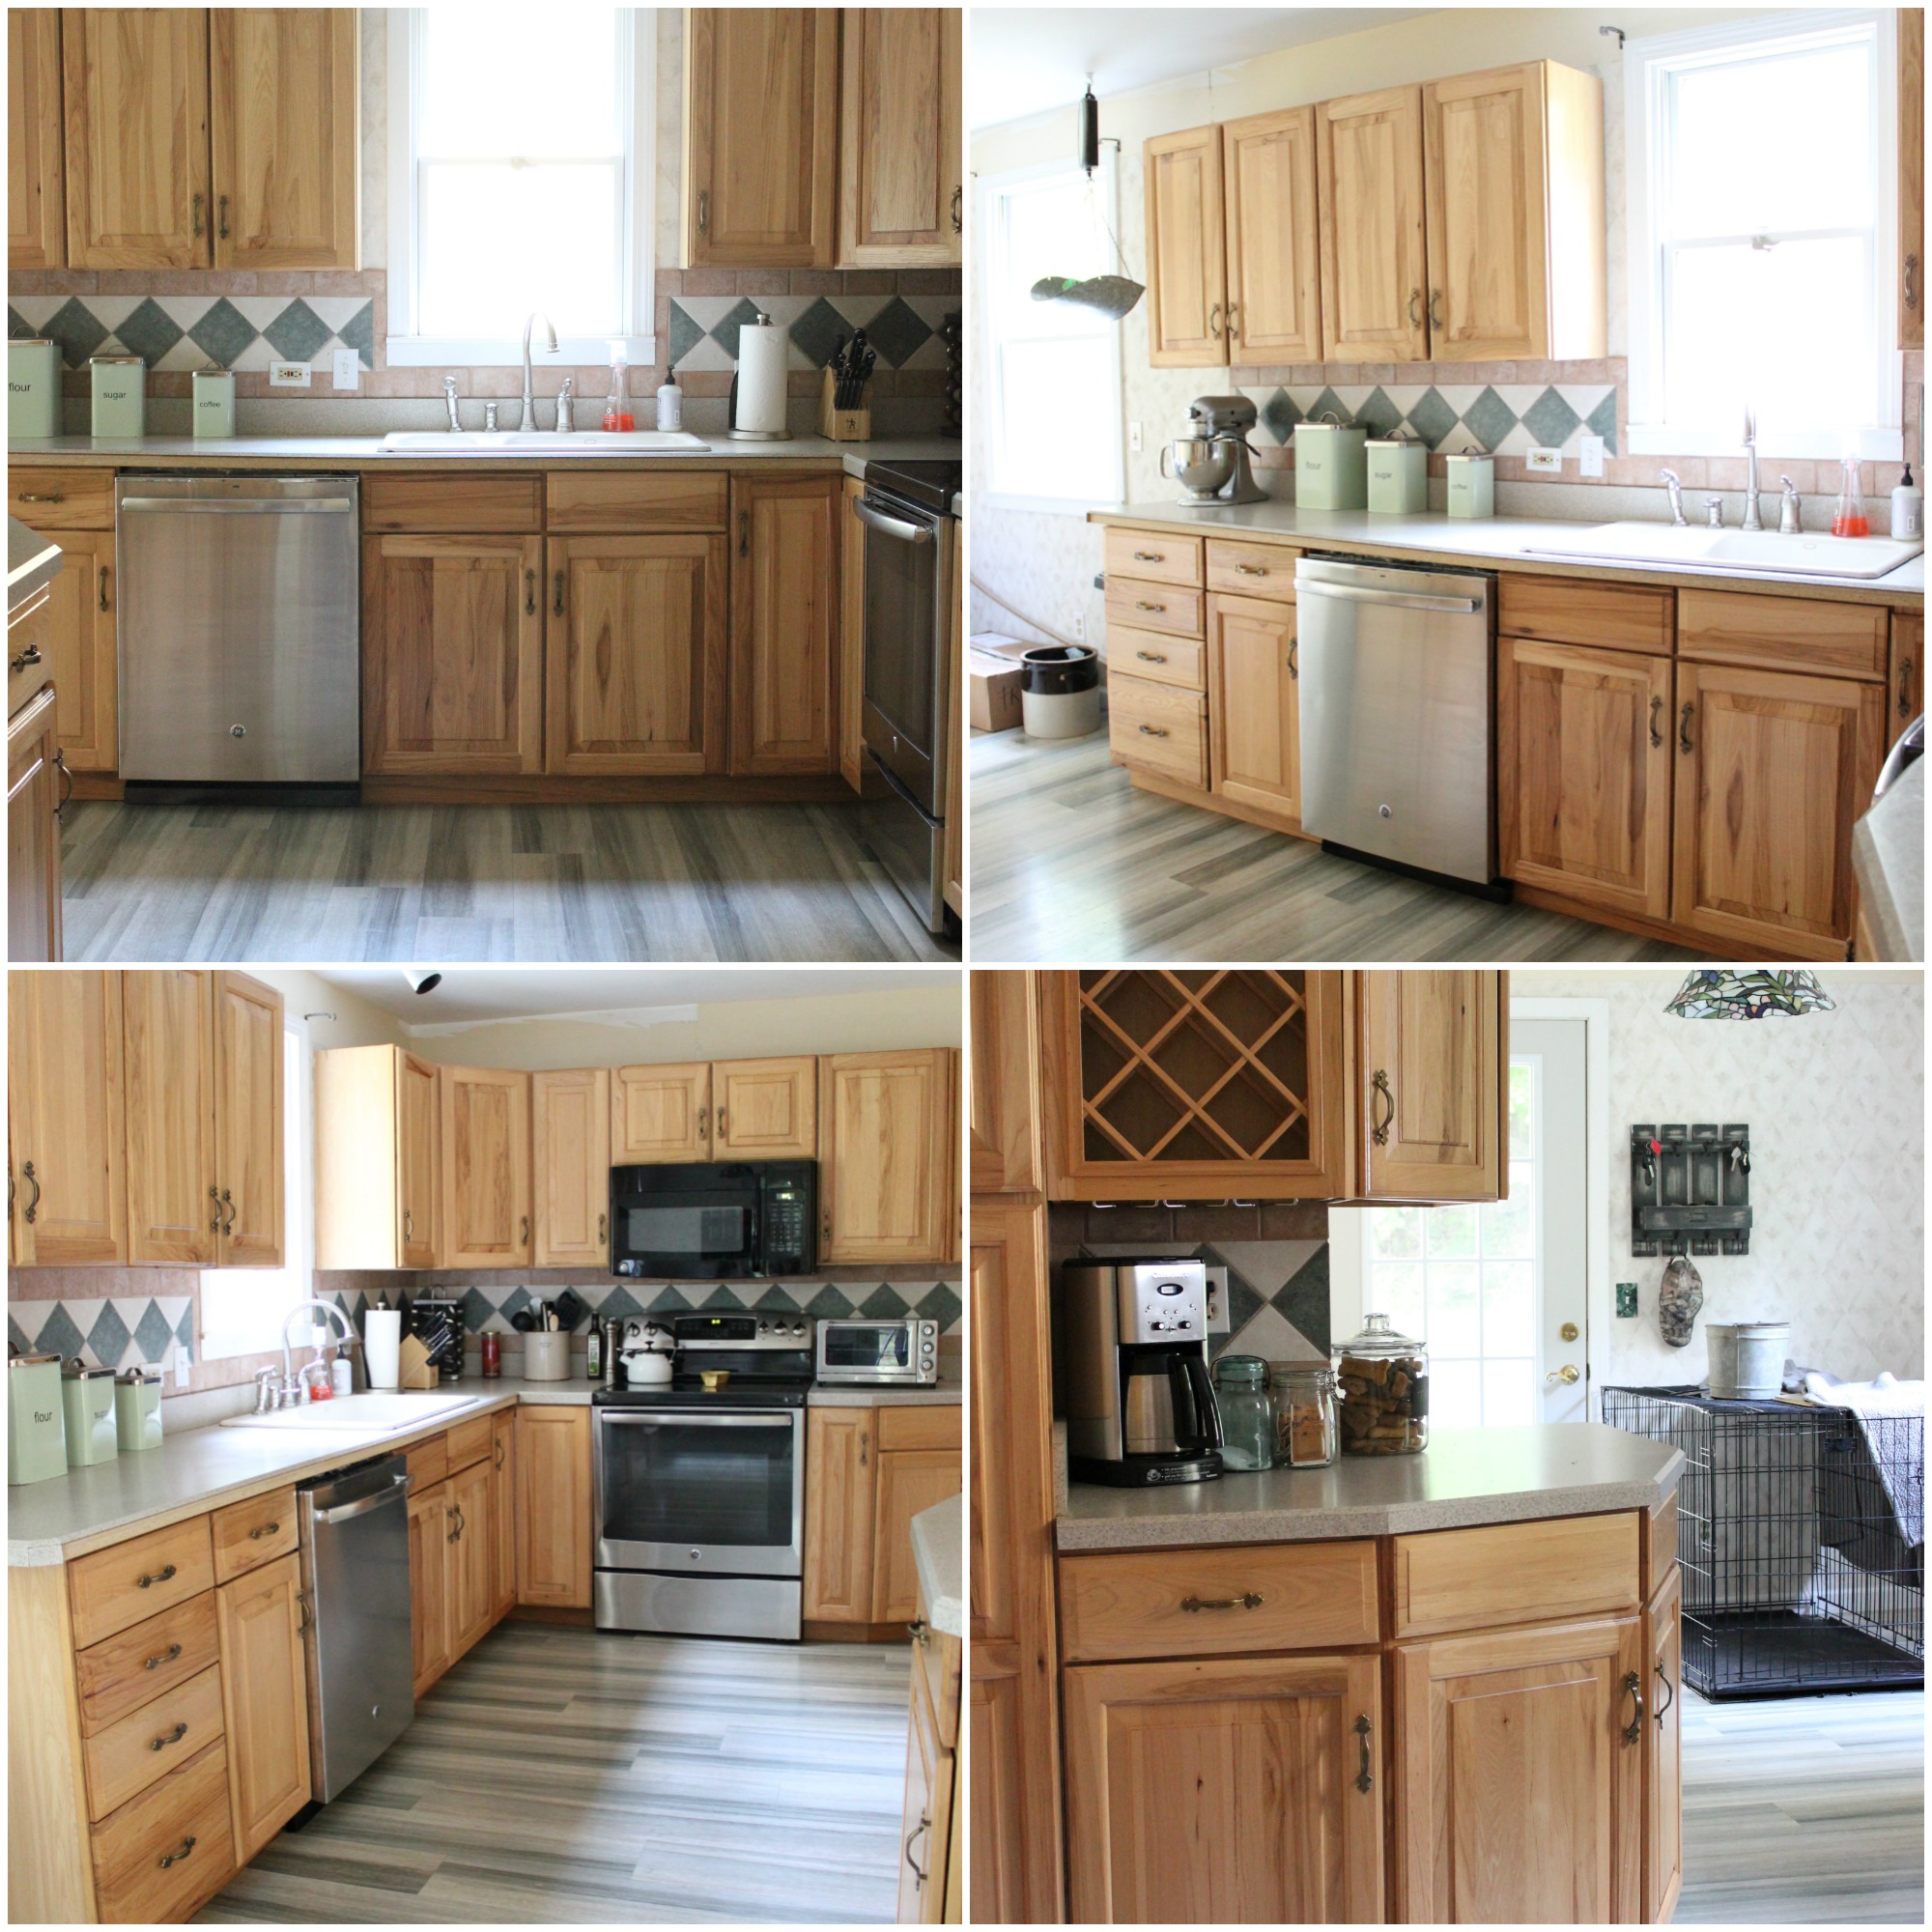
The kitchen needed some definite work, but was manageable. I’m grateful it didn’t need to be gutted and that we could work within our means to make it look like we wanted. Really, none of the rooms in our new home needed a full overhaul. That was one feature we loved about this home. It was in great shape, but needed my style 😉
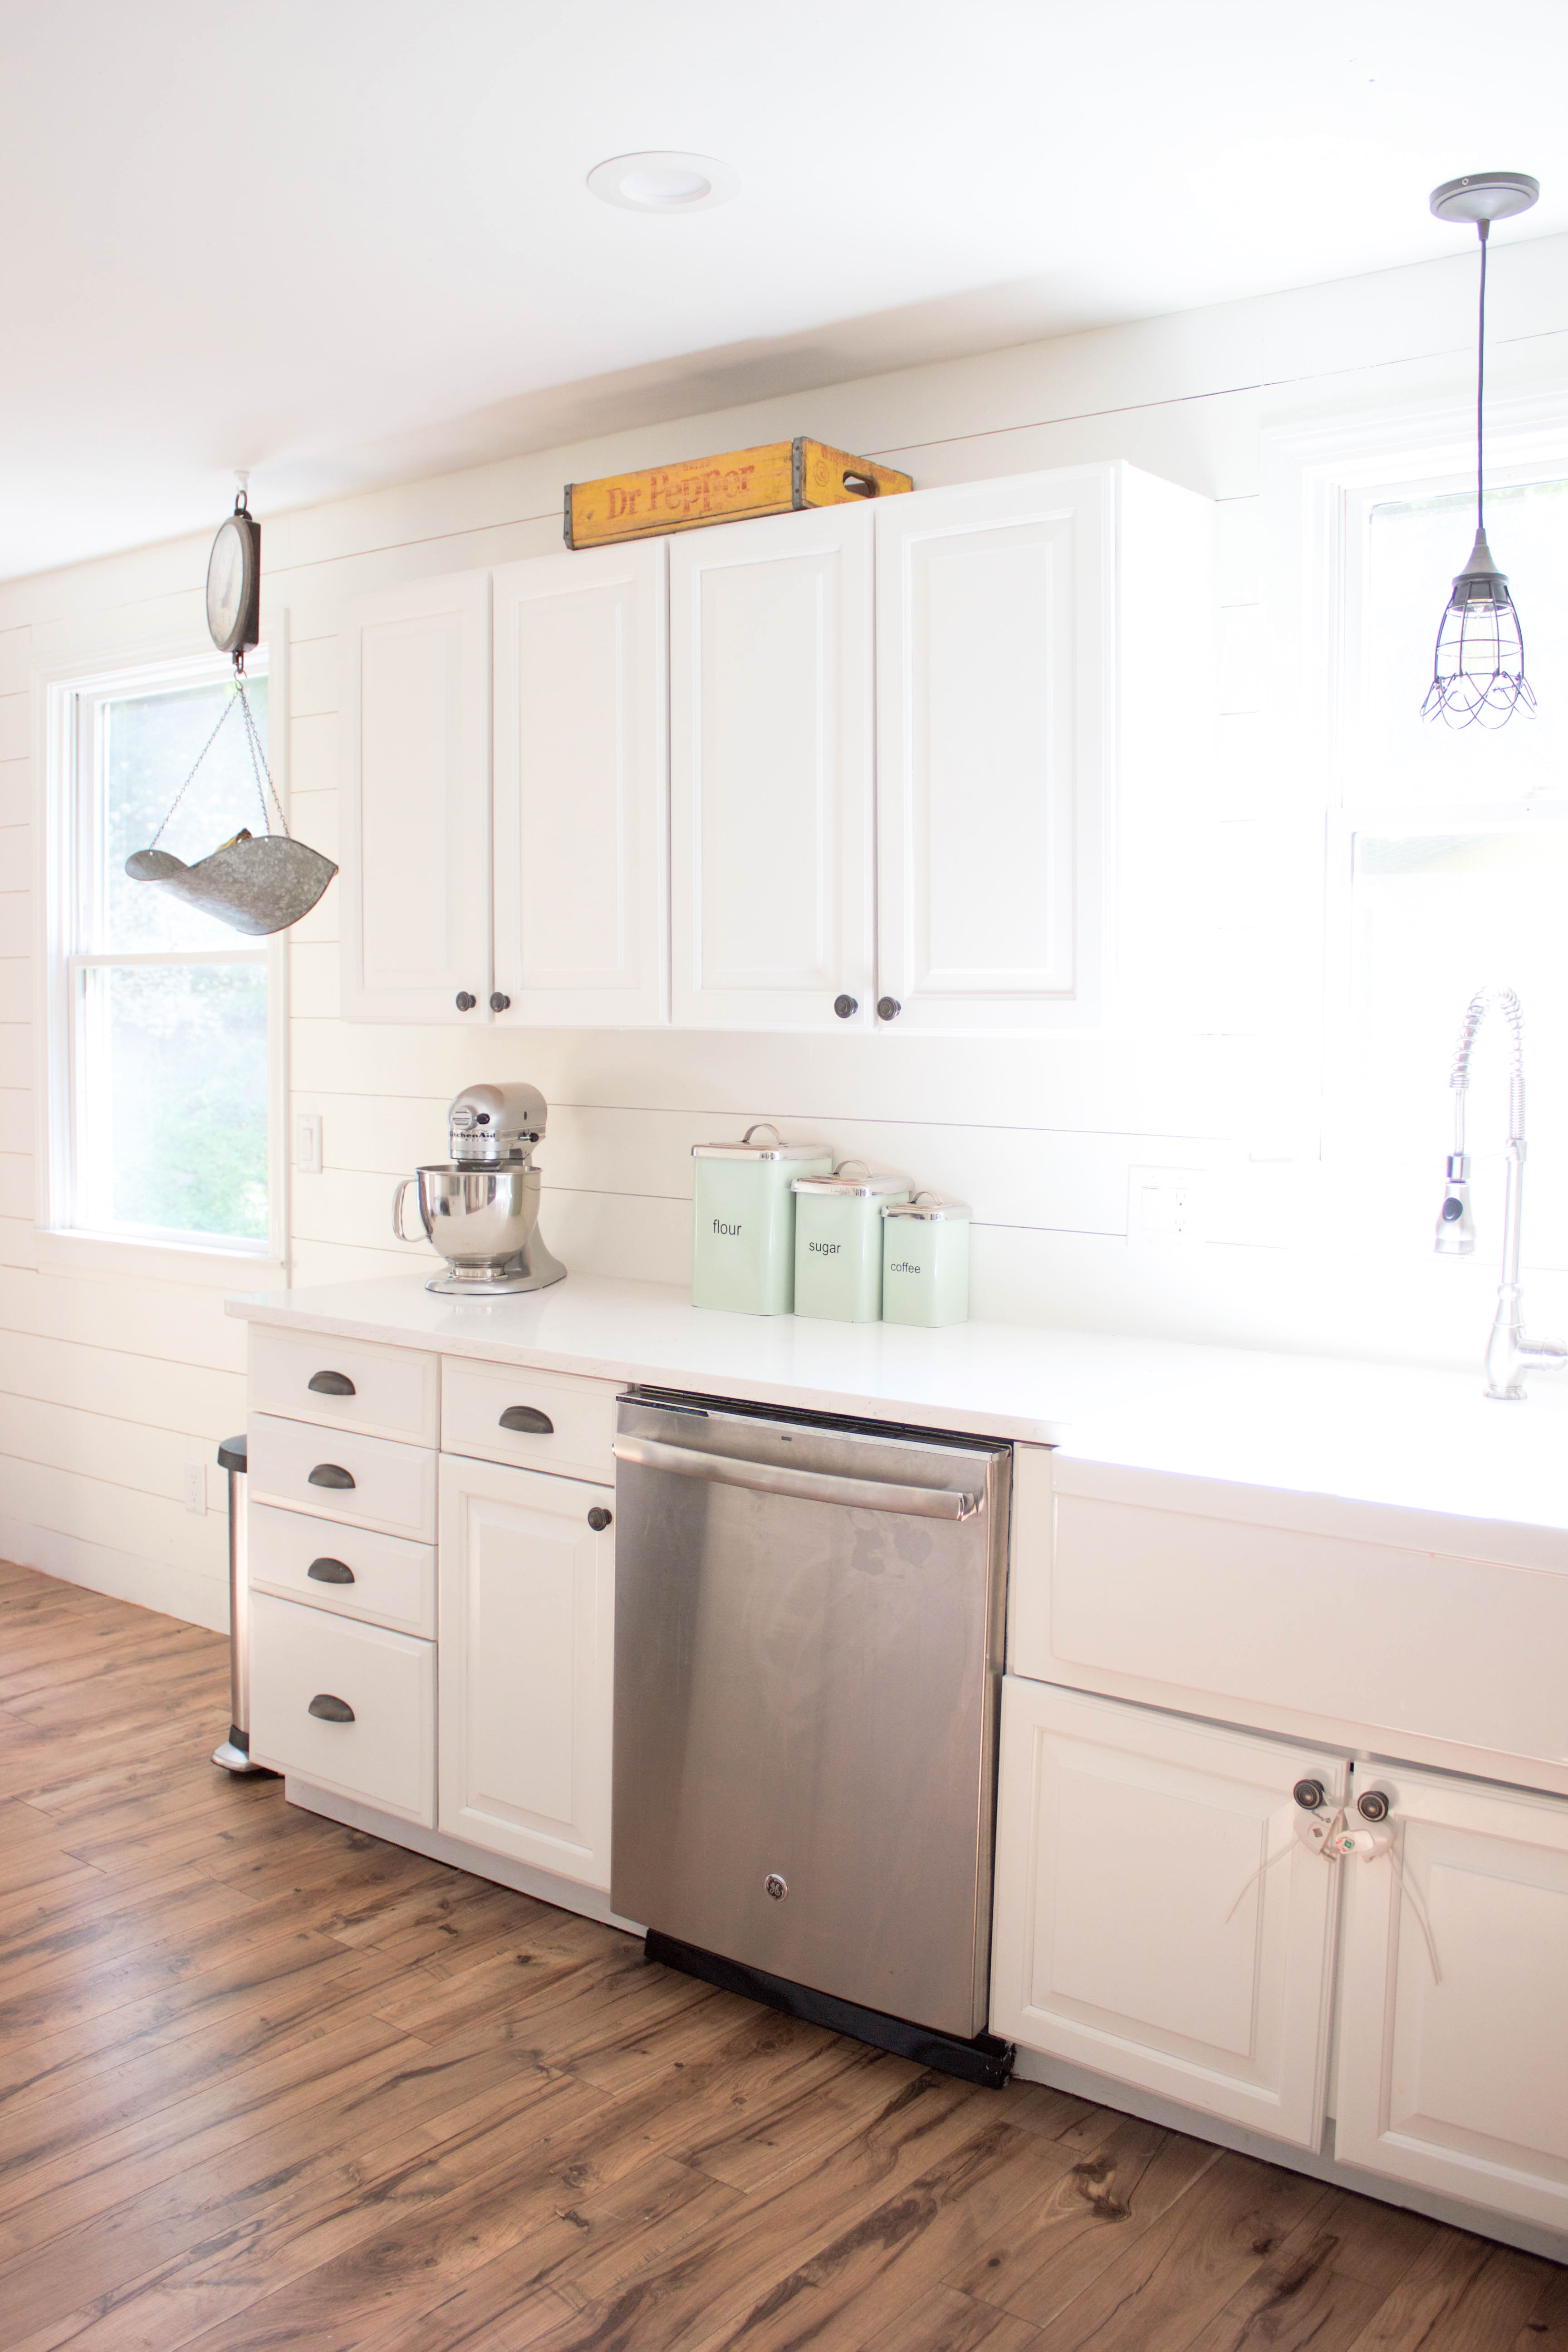
The cabinets were quite the undertaking, but they were in great shape and had good “bones” if you will. You can read all about how we updated our farmhouse kitchen and painted them here. I’m still SO happy with the turn out, and I feel like they don’t even look painted. I really attribute that to the type of paint we used, so if you’re in the market to paint your cabinets be sure to check out the post!
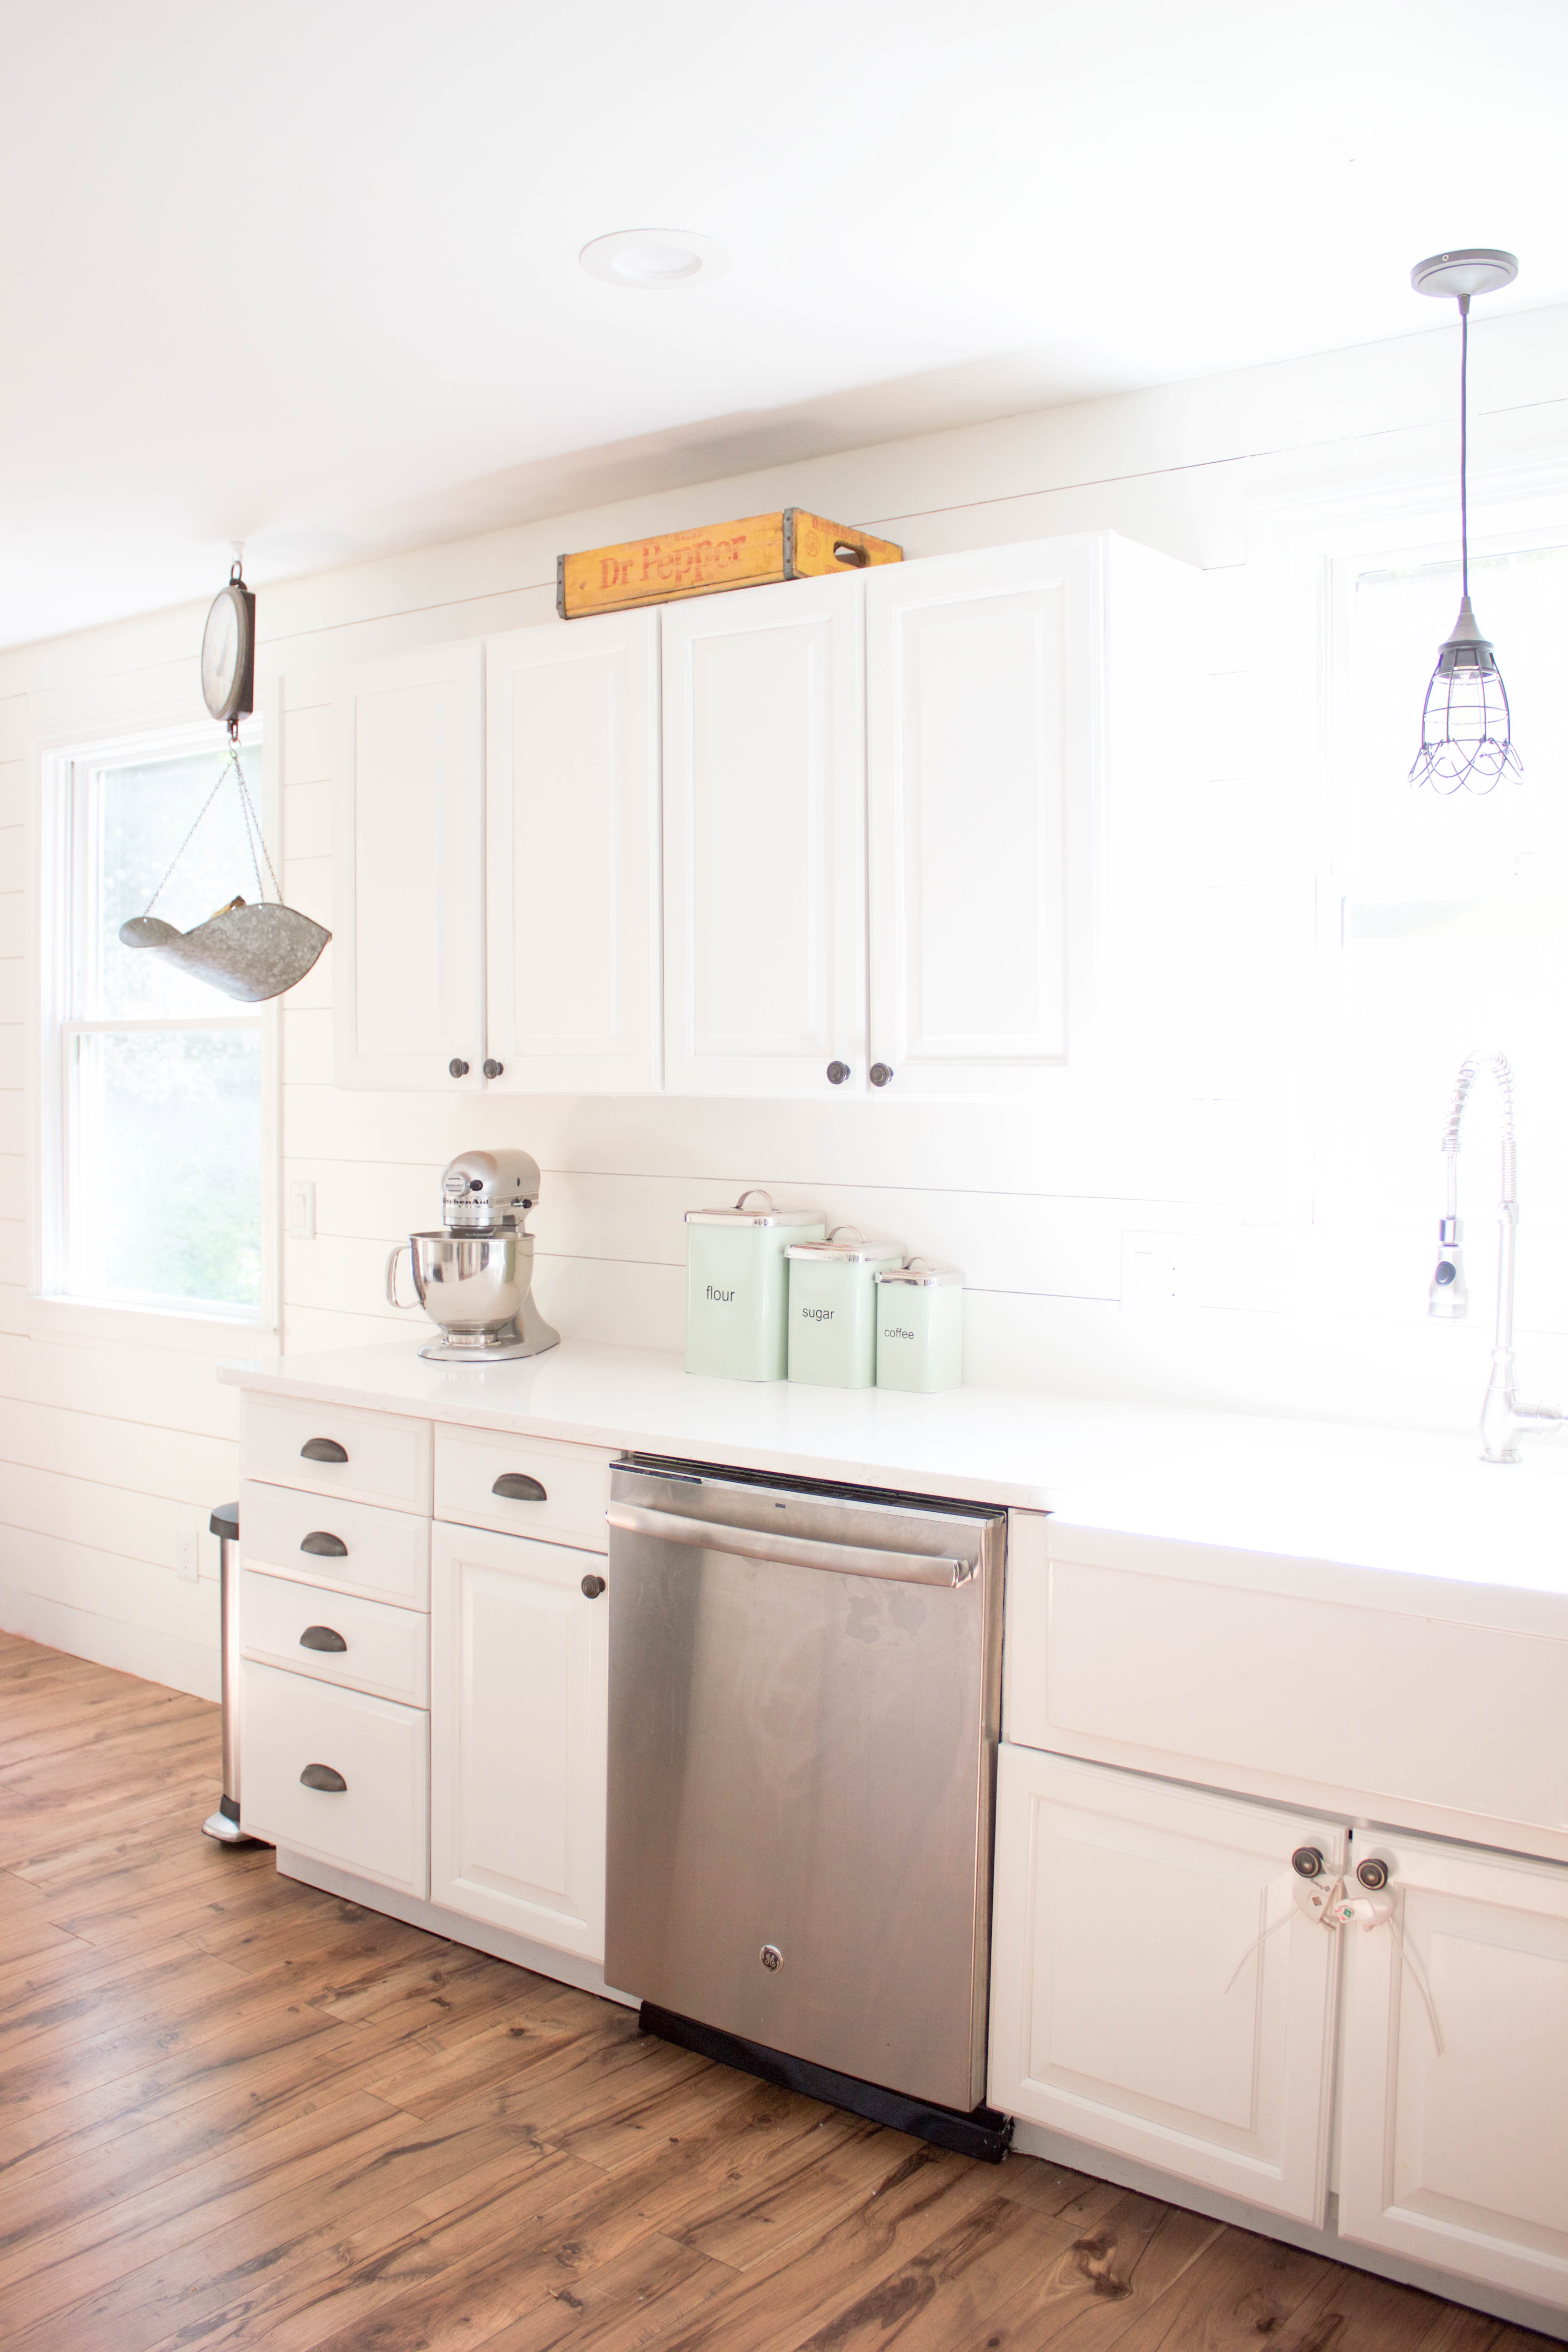
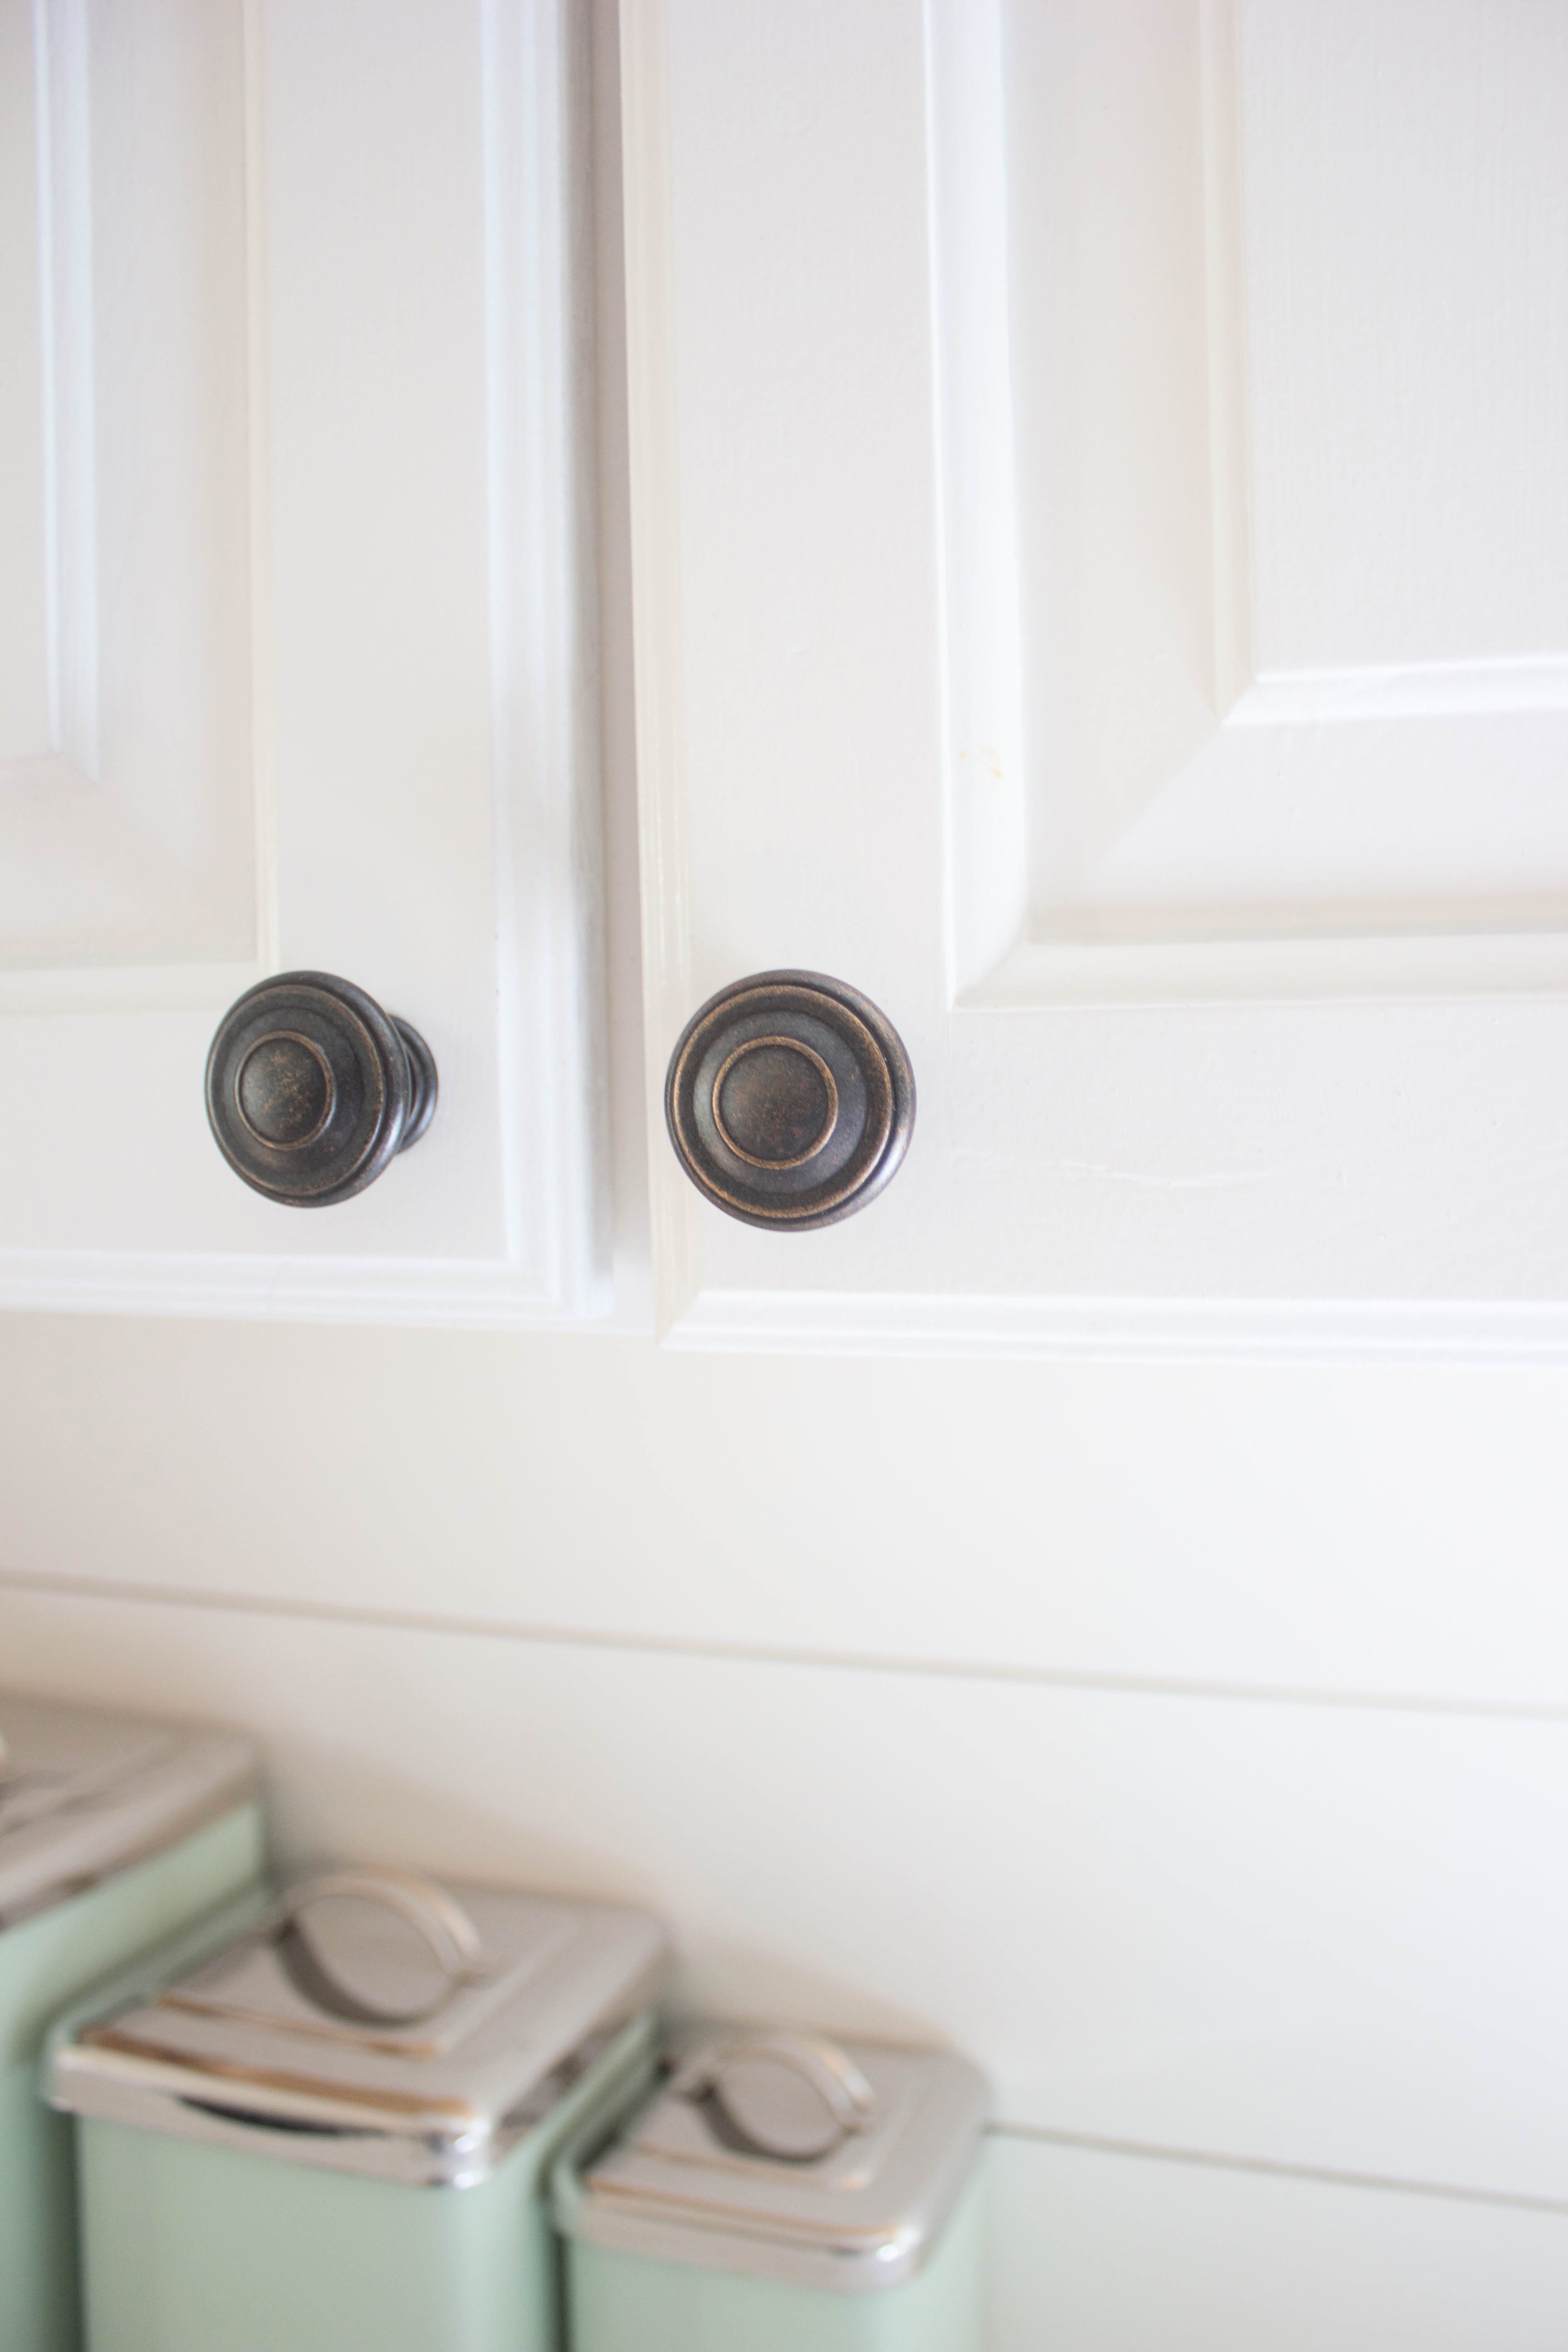
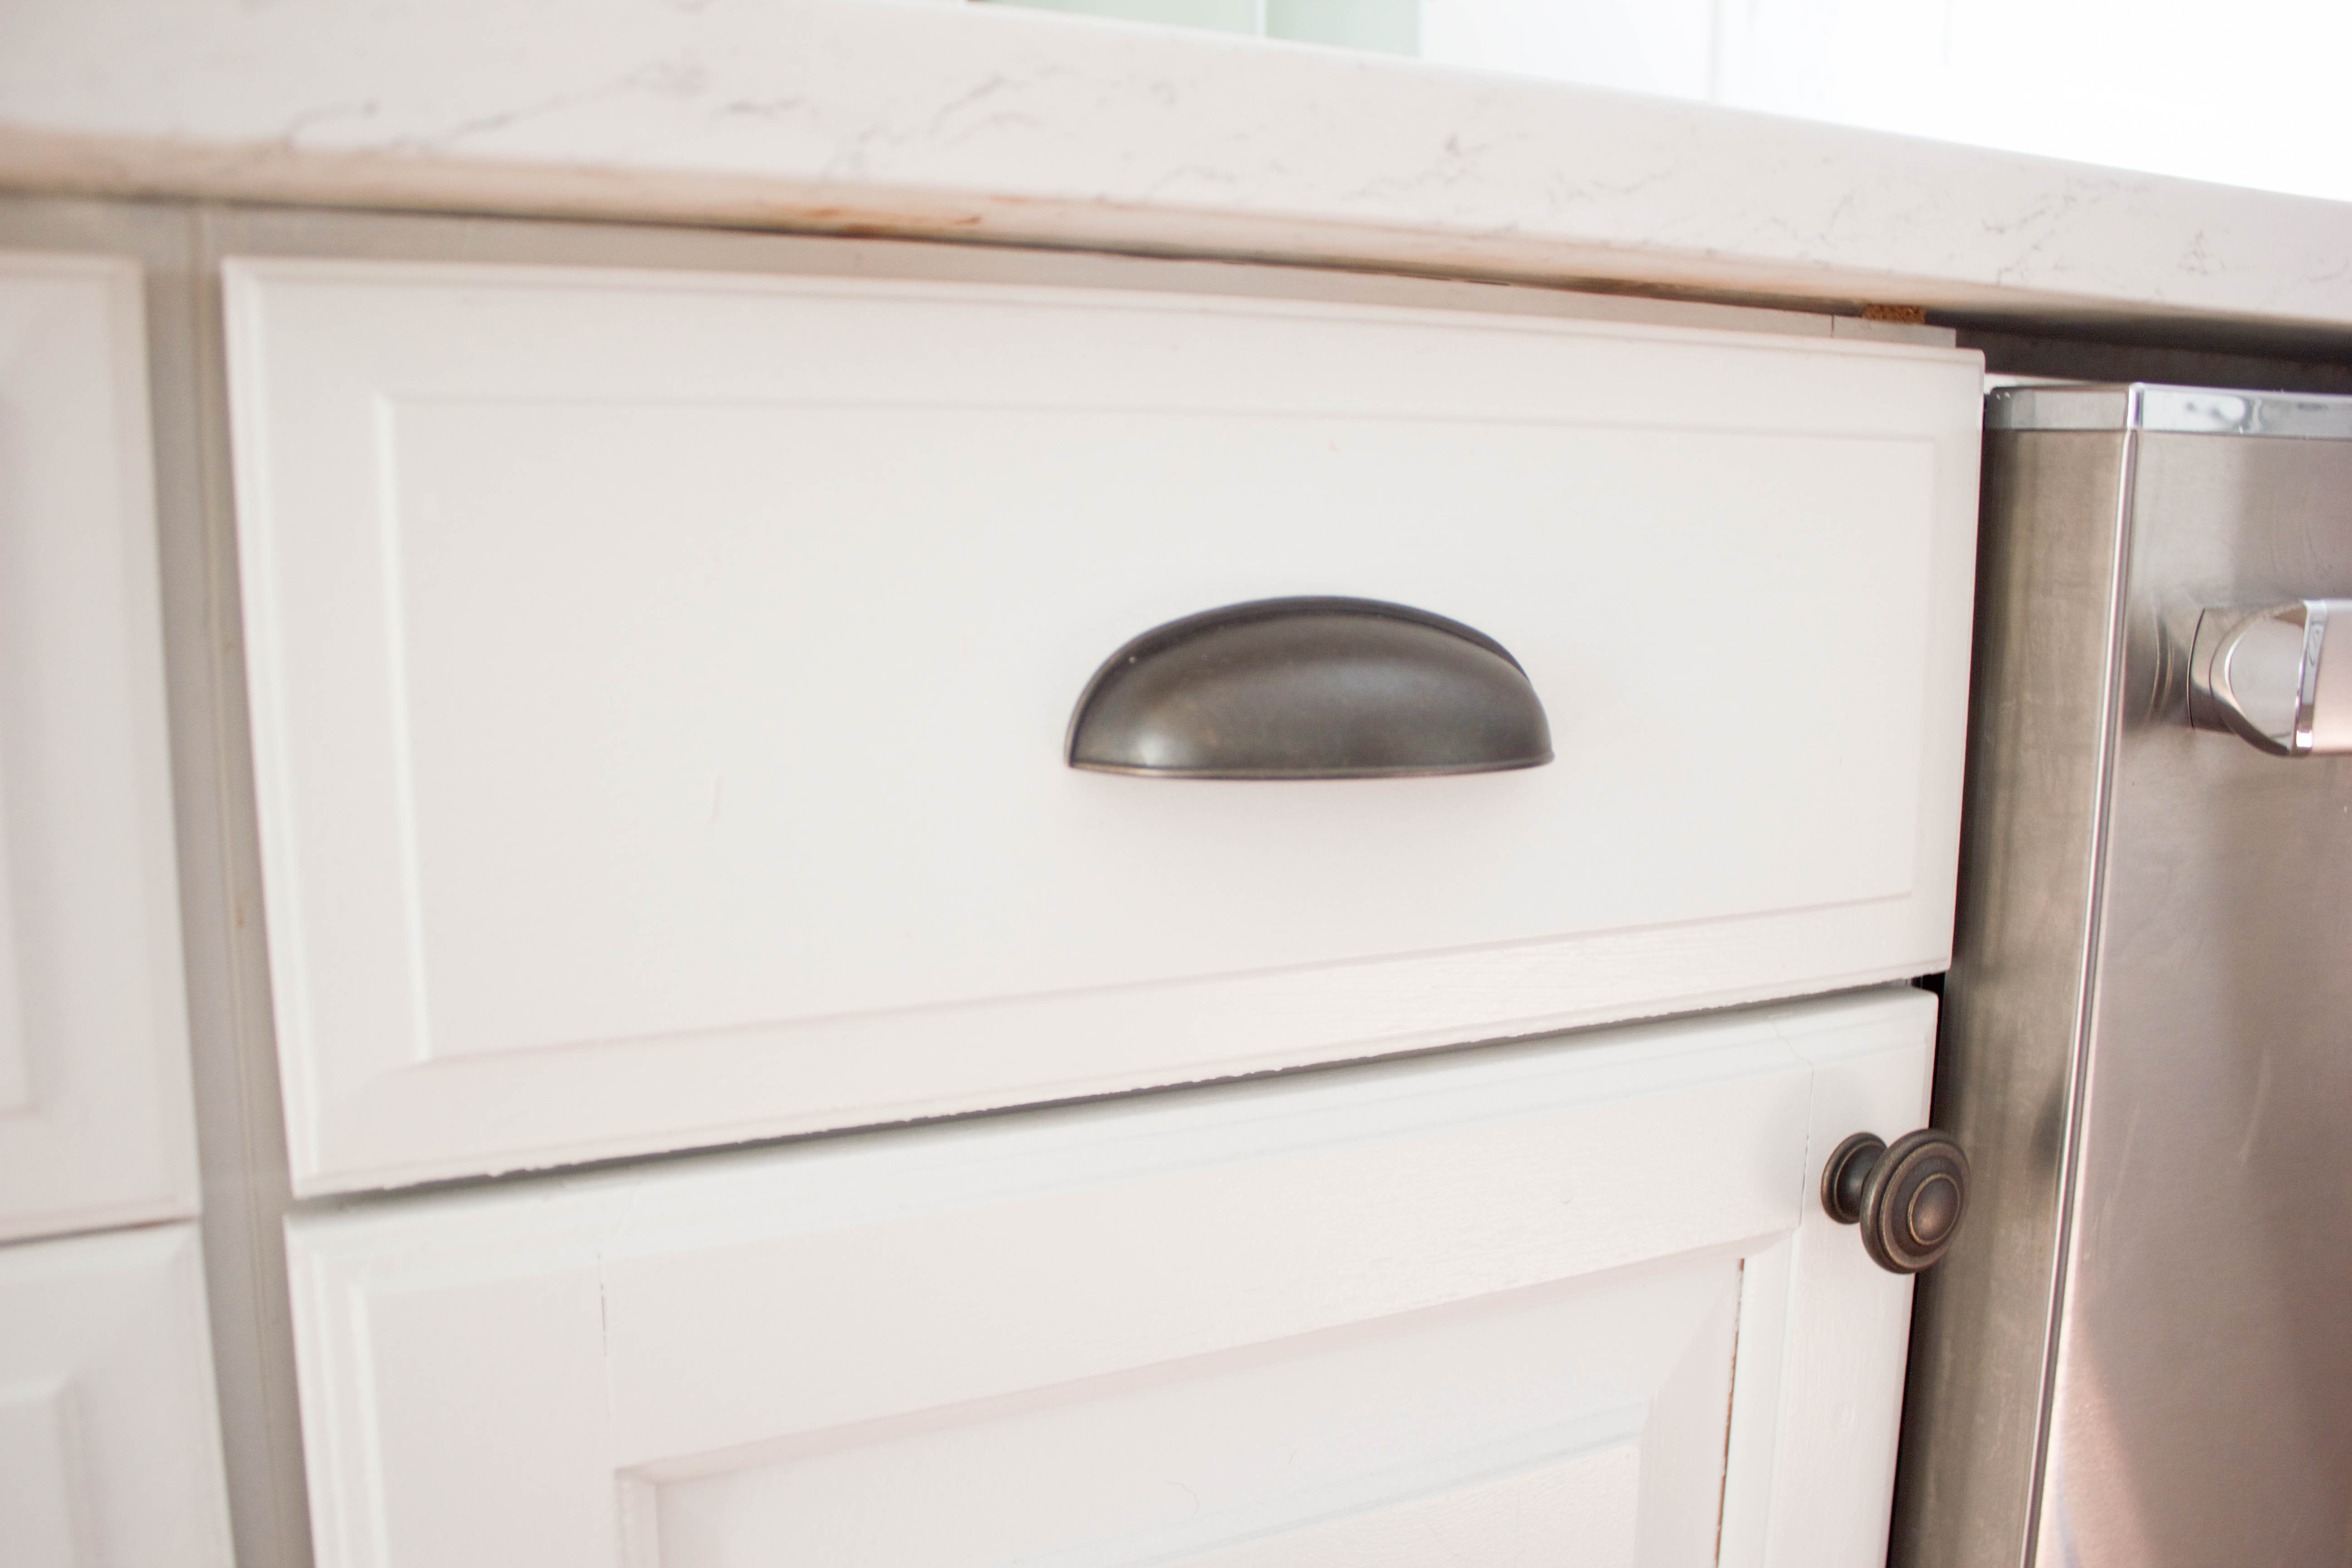
I knew I wanted dark hardware for a farmhouse kitchen look, and was drawn to these cup handles and knobs. I love the contrast of the dark against the white cabinets.
The farmhouse sink is probably my favorite feature of our kitchen. I’ve dreamed of having this sink for years, and it makes me smile whenever I walk into the room. I’ve also grown accustomed to its large size. You can read all about the pros and cons of having a farmhouse kitchen sink right here. And what’s a farmhouse sink without a gorgeous faucet? This one from Signature Hardware added some flare as opposed to a standard faucet.
Our countertops are quartz by Wilsonart, and I love that they’re nonporous and durable. You can read more about why we chose quartz countertops here, and the great experience we had with Wilsonart (I still highly recommend!).
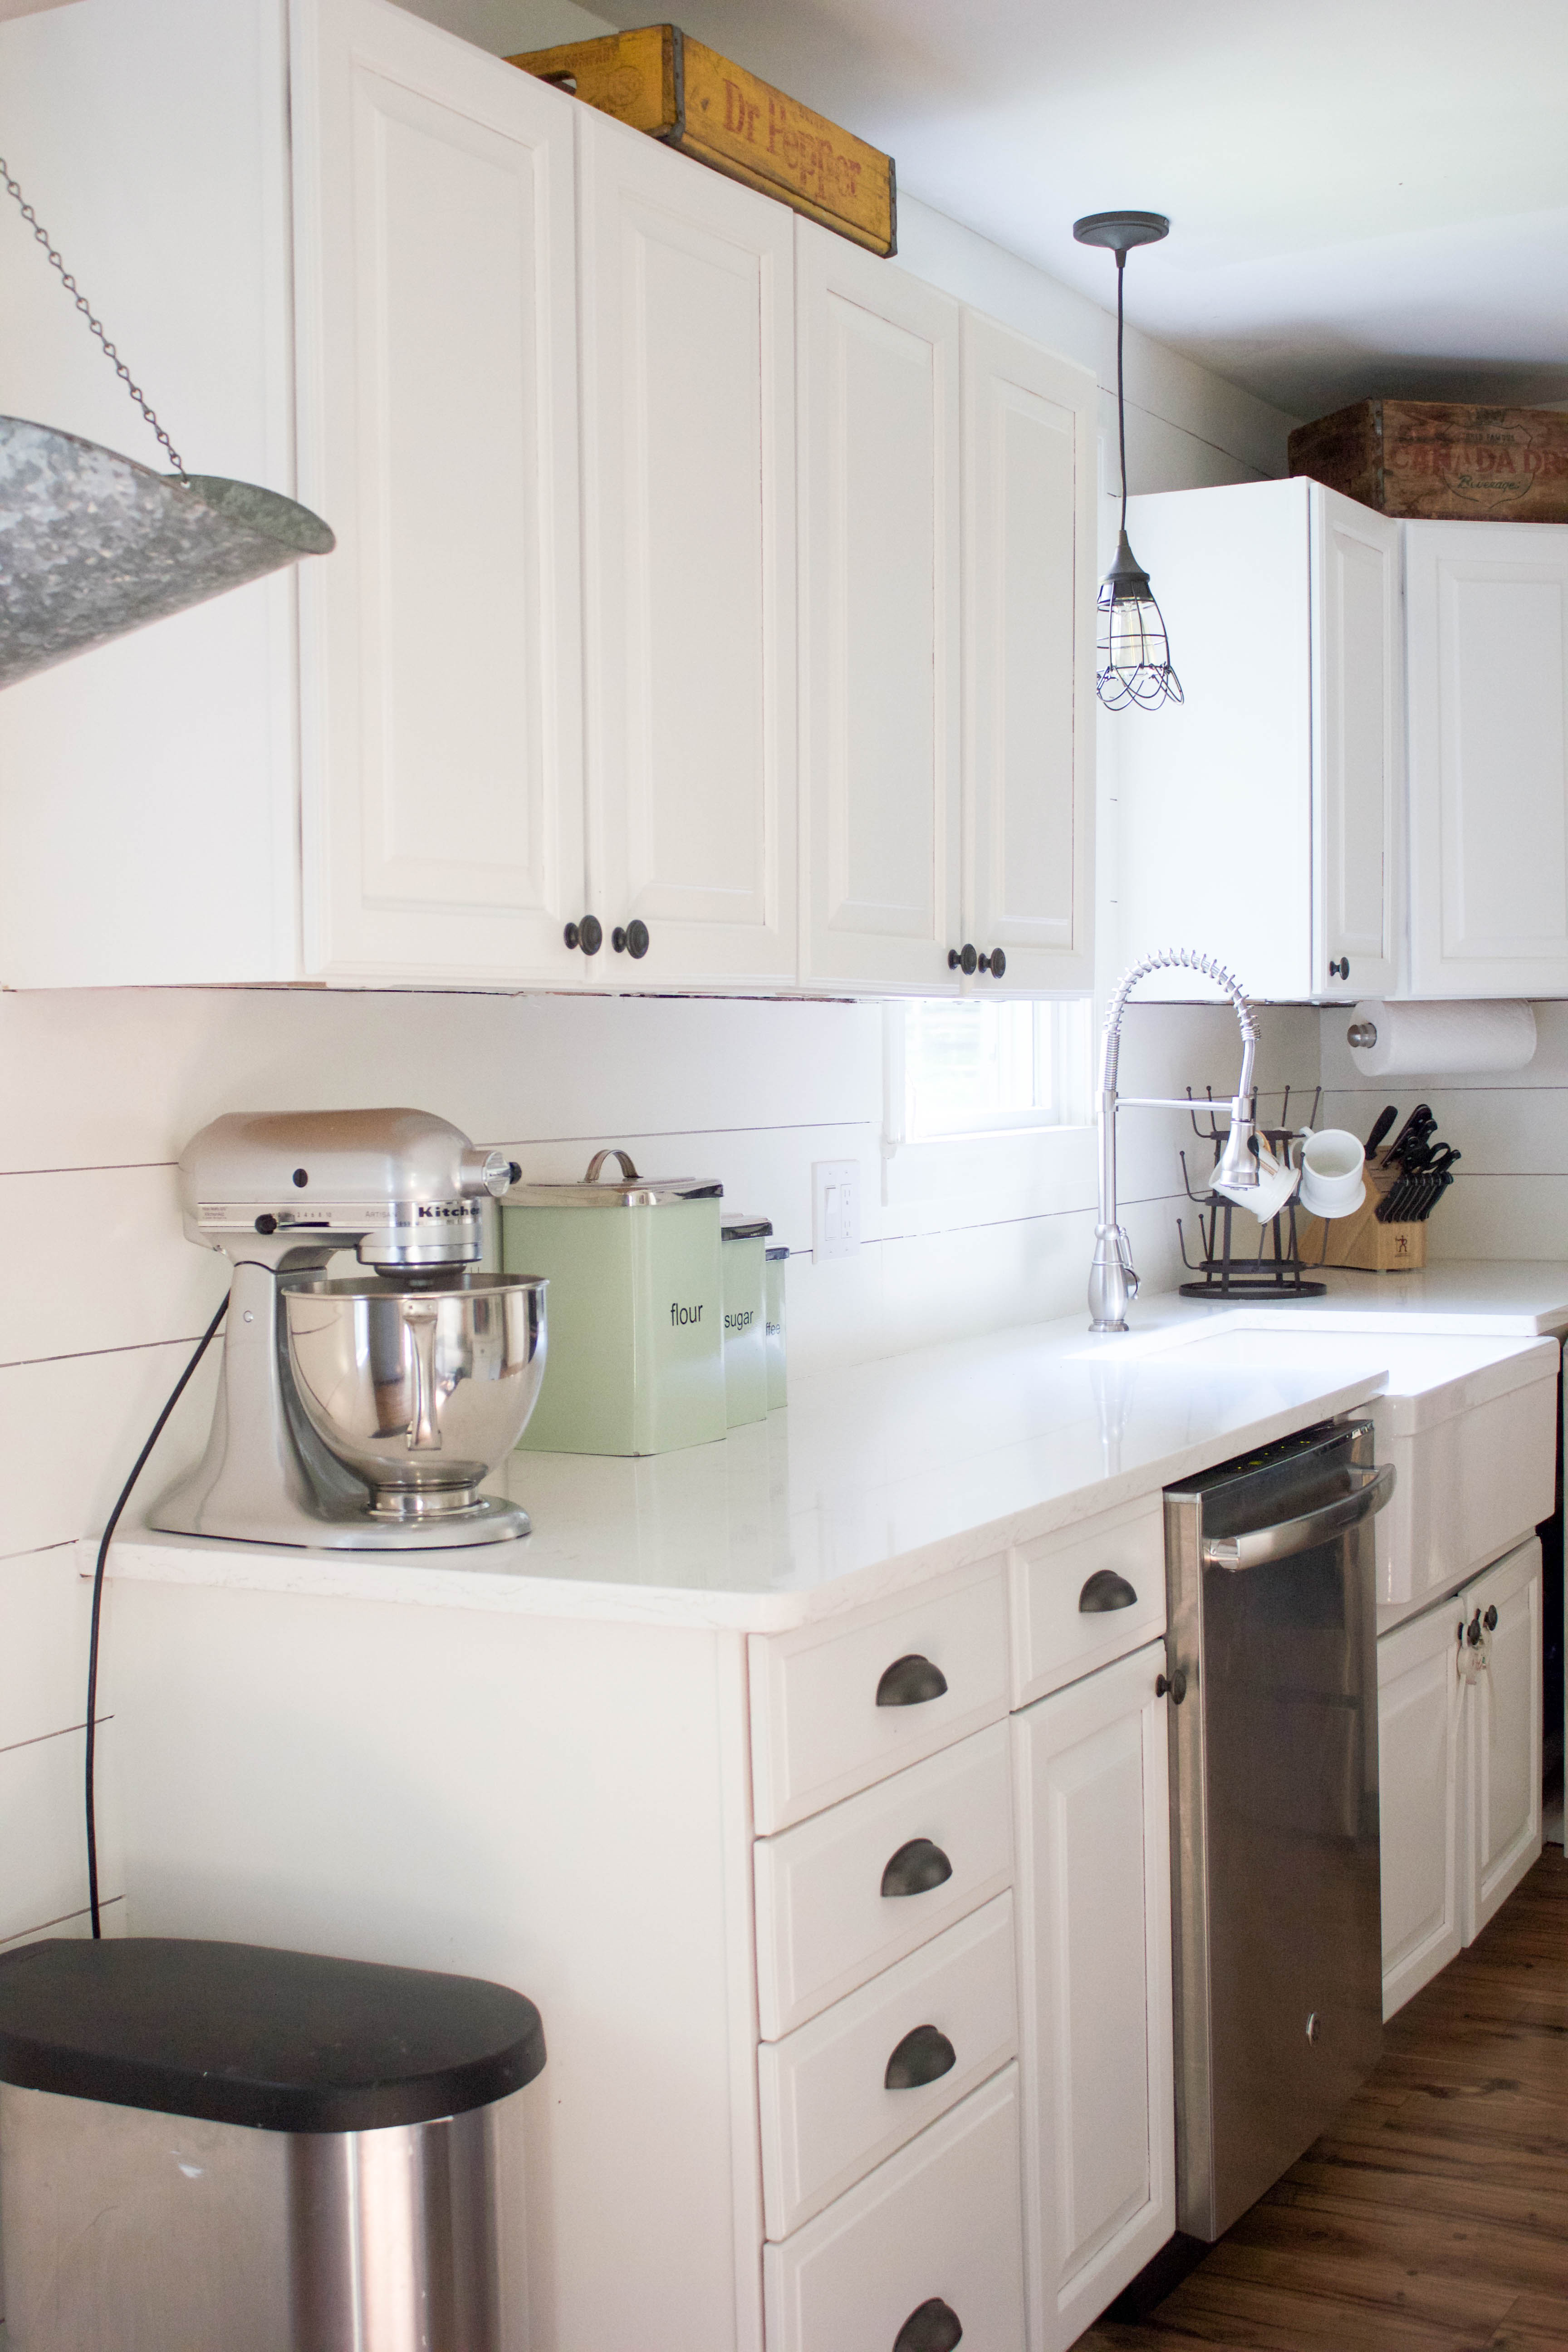

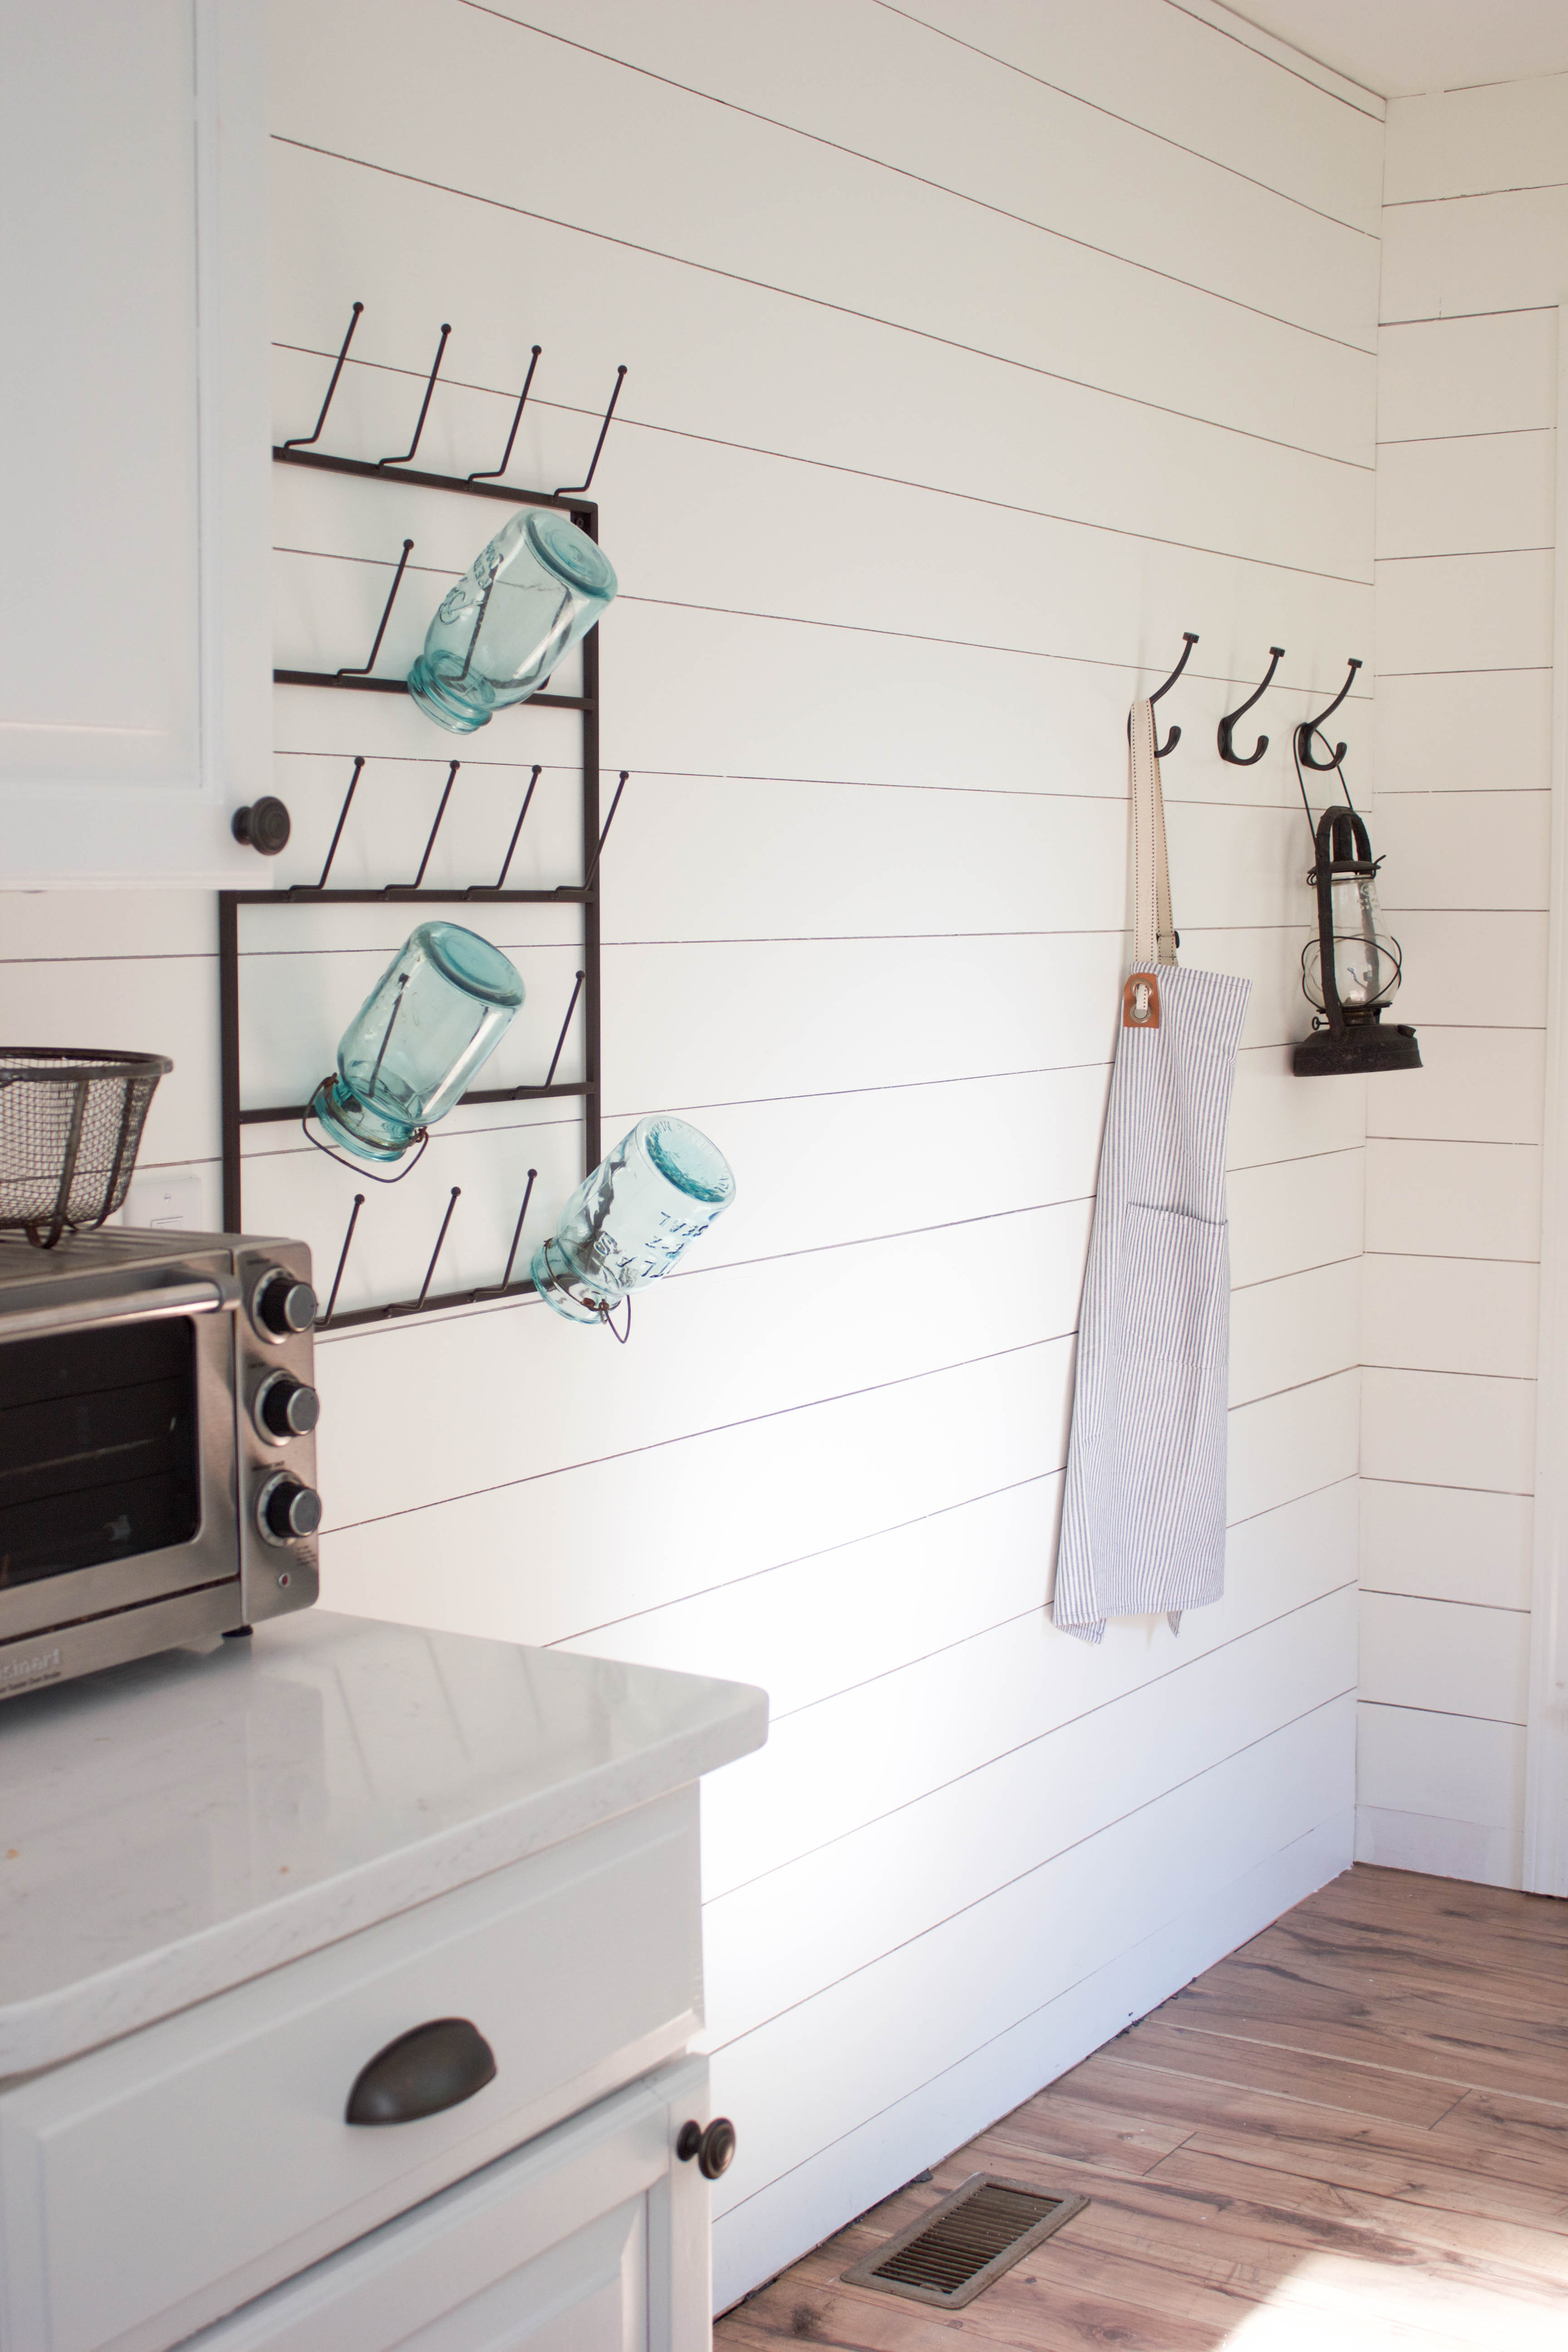
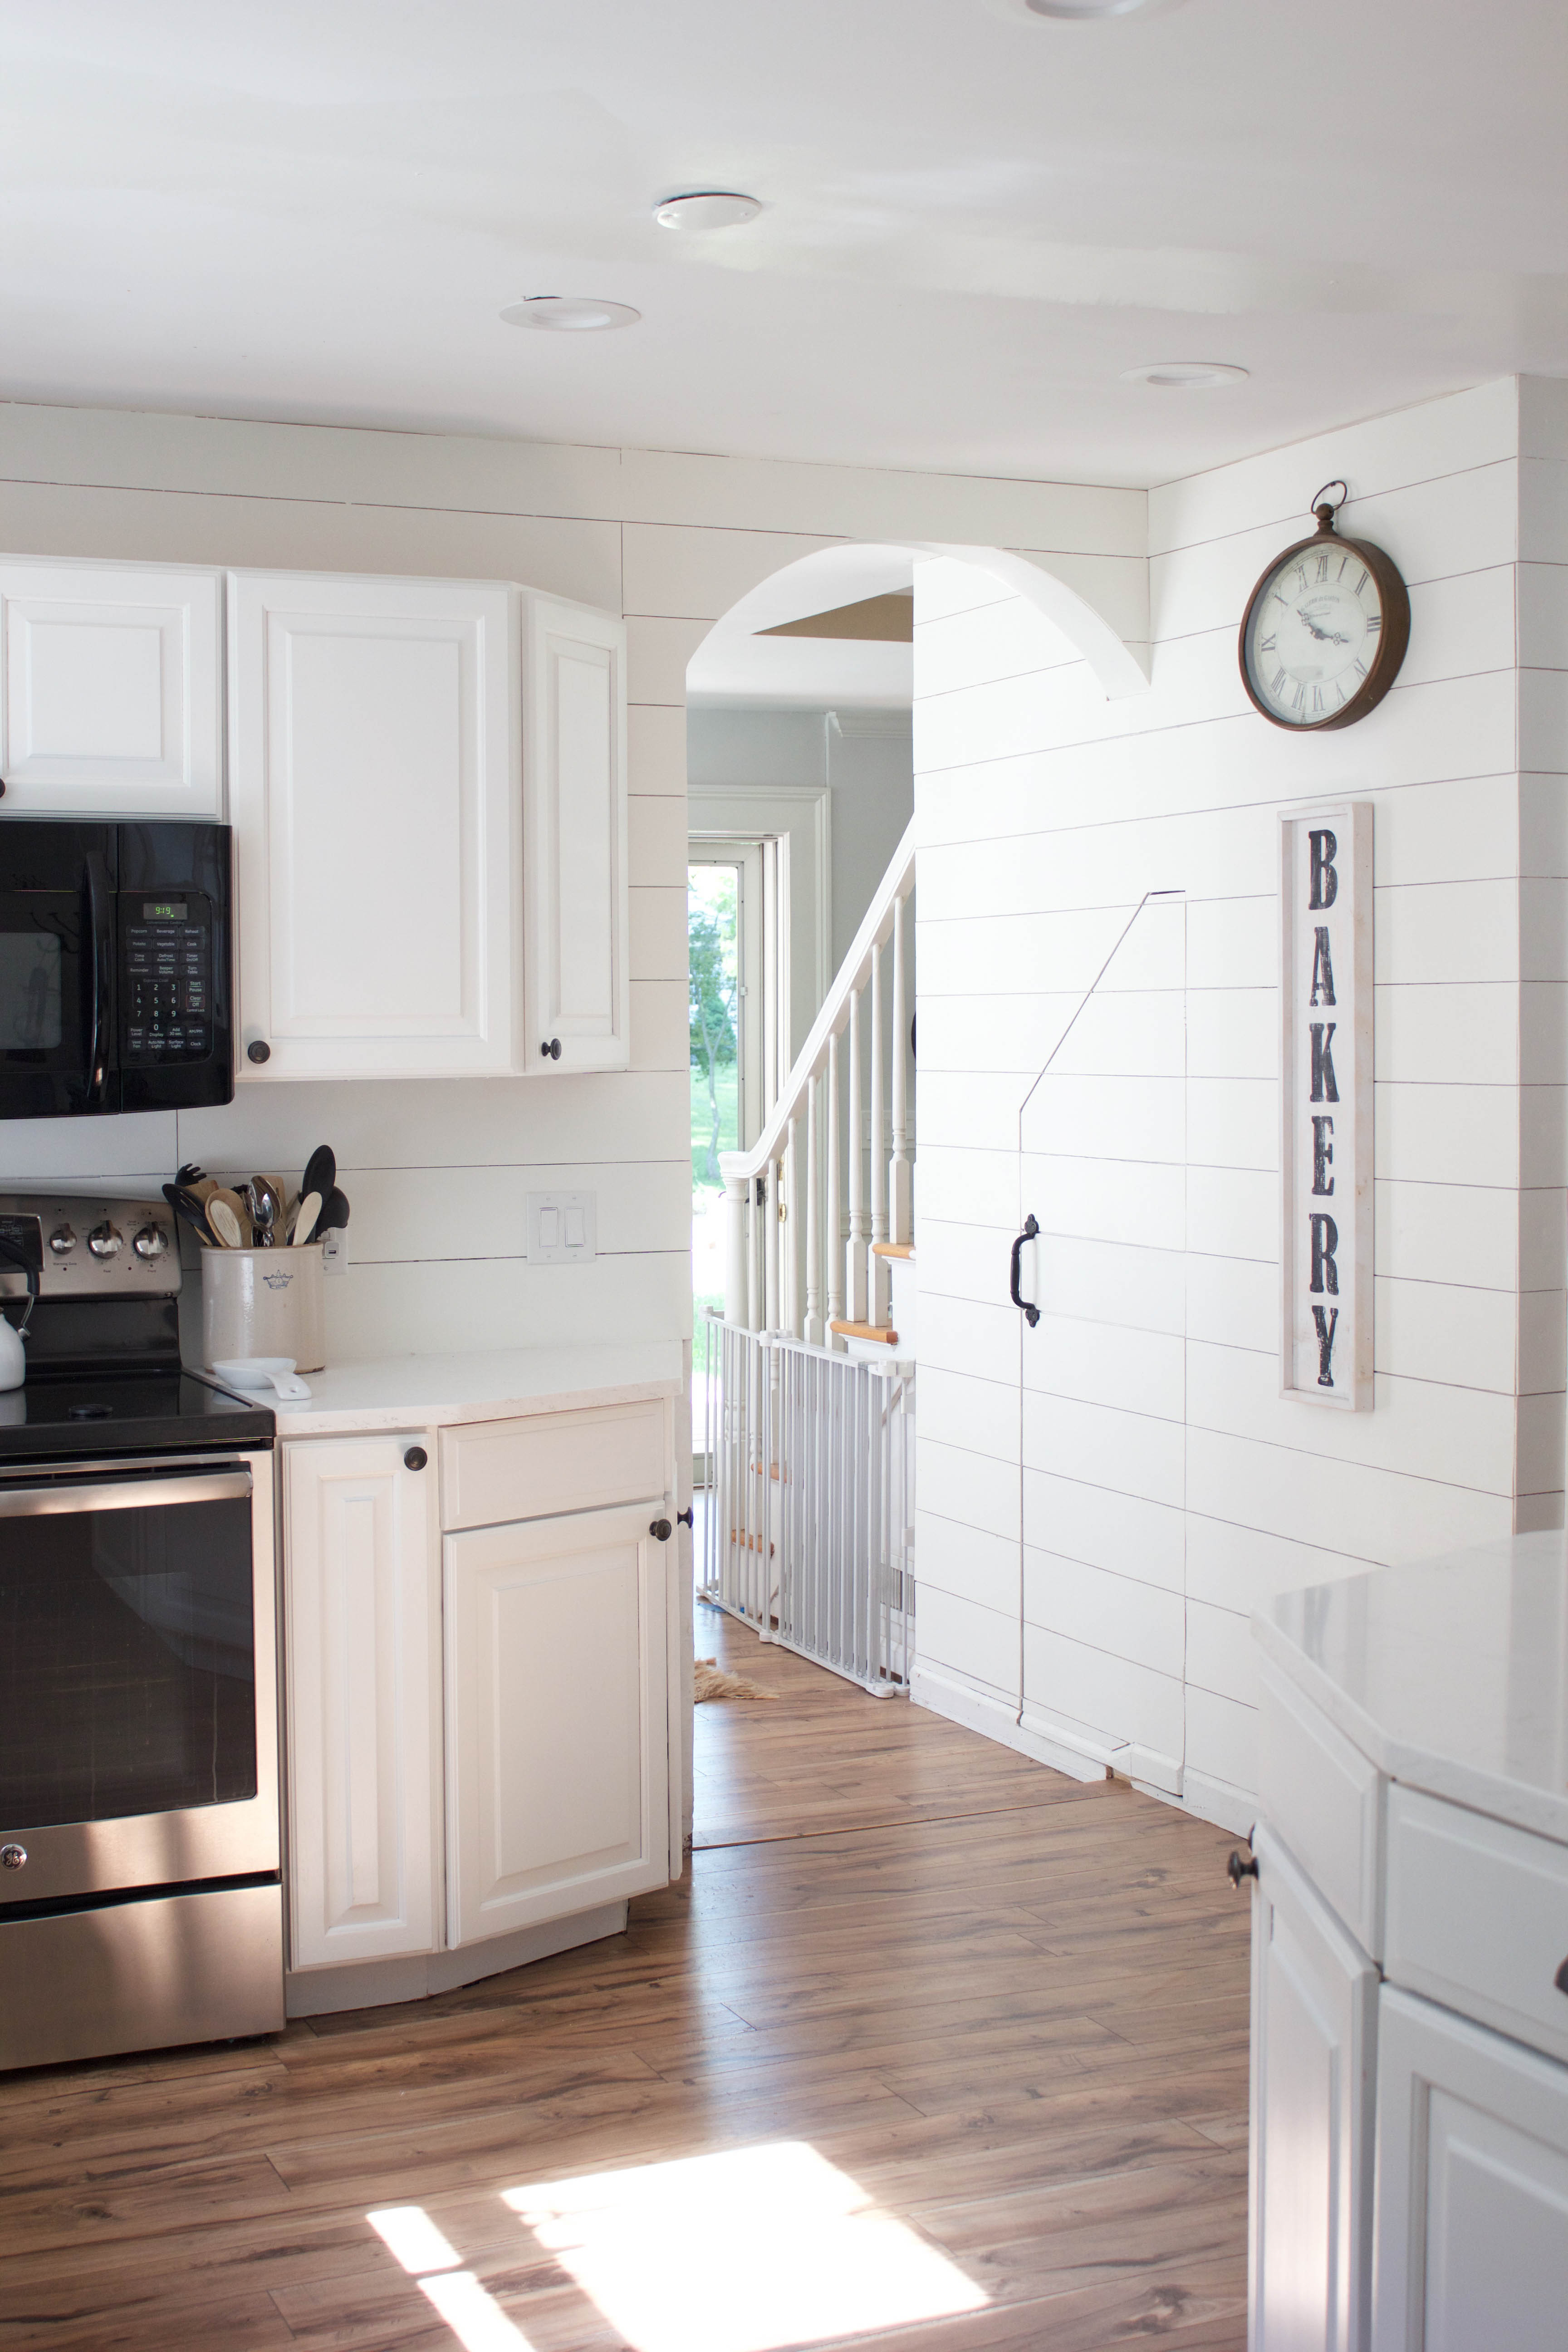
My second favorite feature in our farmhouse kitchen is the shiplap walls. This was probably the longest project but I love how it turned out! You can read how we did this simple DIY here. I think it really gives a farmhouse touch, and it also breaks up all the white. I feel it wouldn’t look the same if it was just white walls. Originally we debated subway tile for the backsplash, but decided to plank everything to get that whole farmhouse kitchen look. It was way more closet effective that way too.
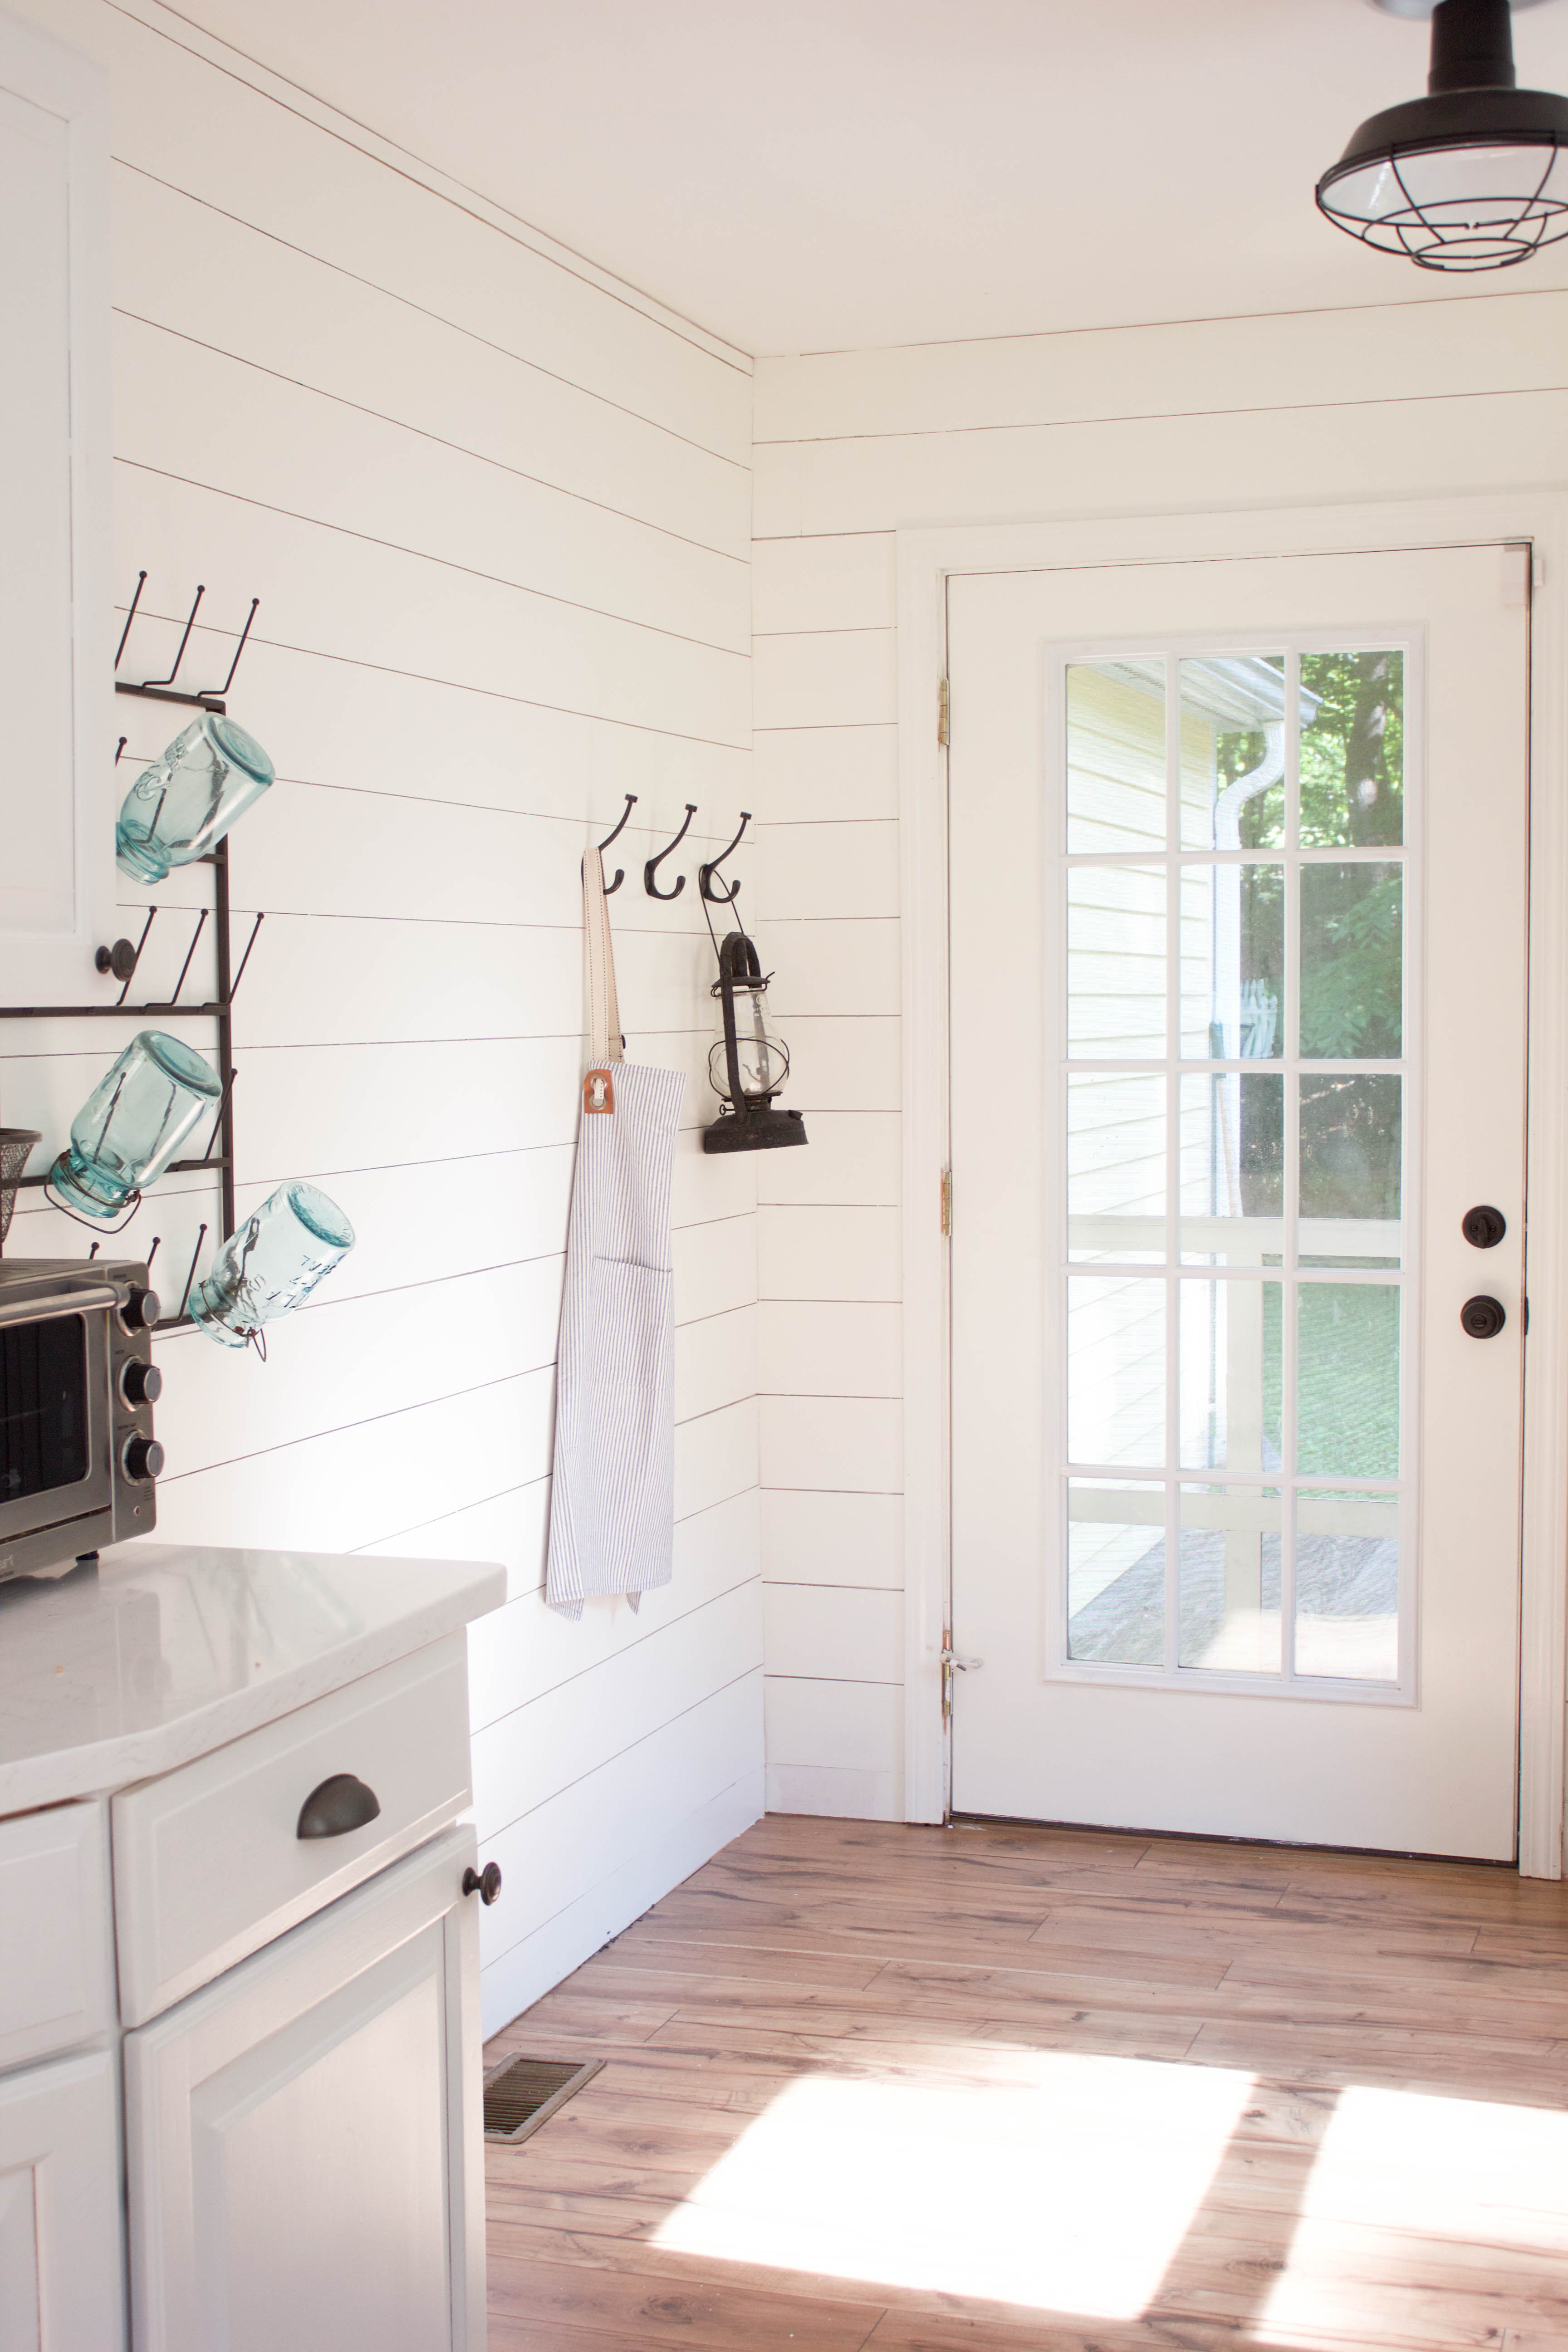
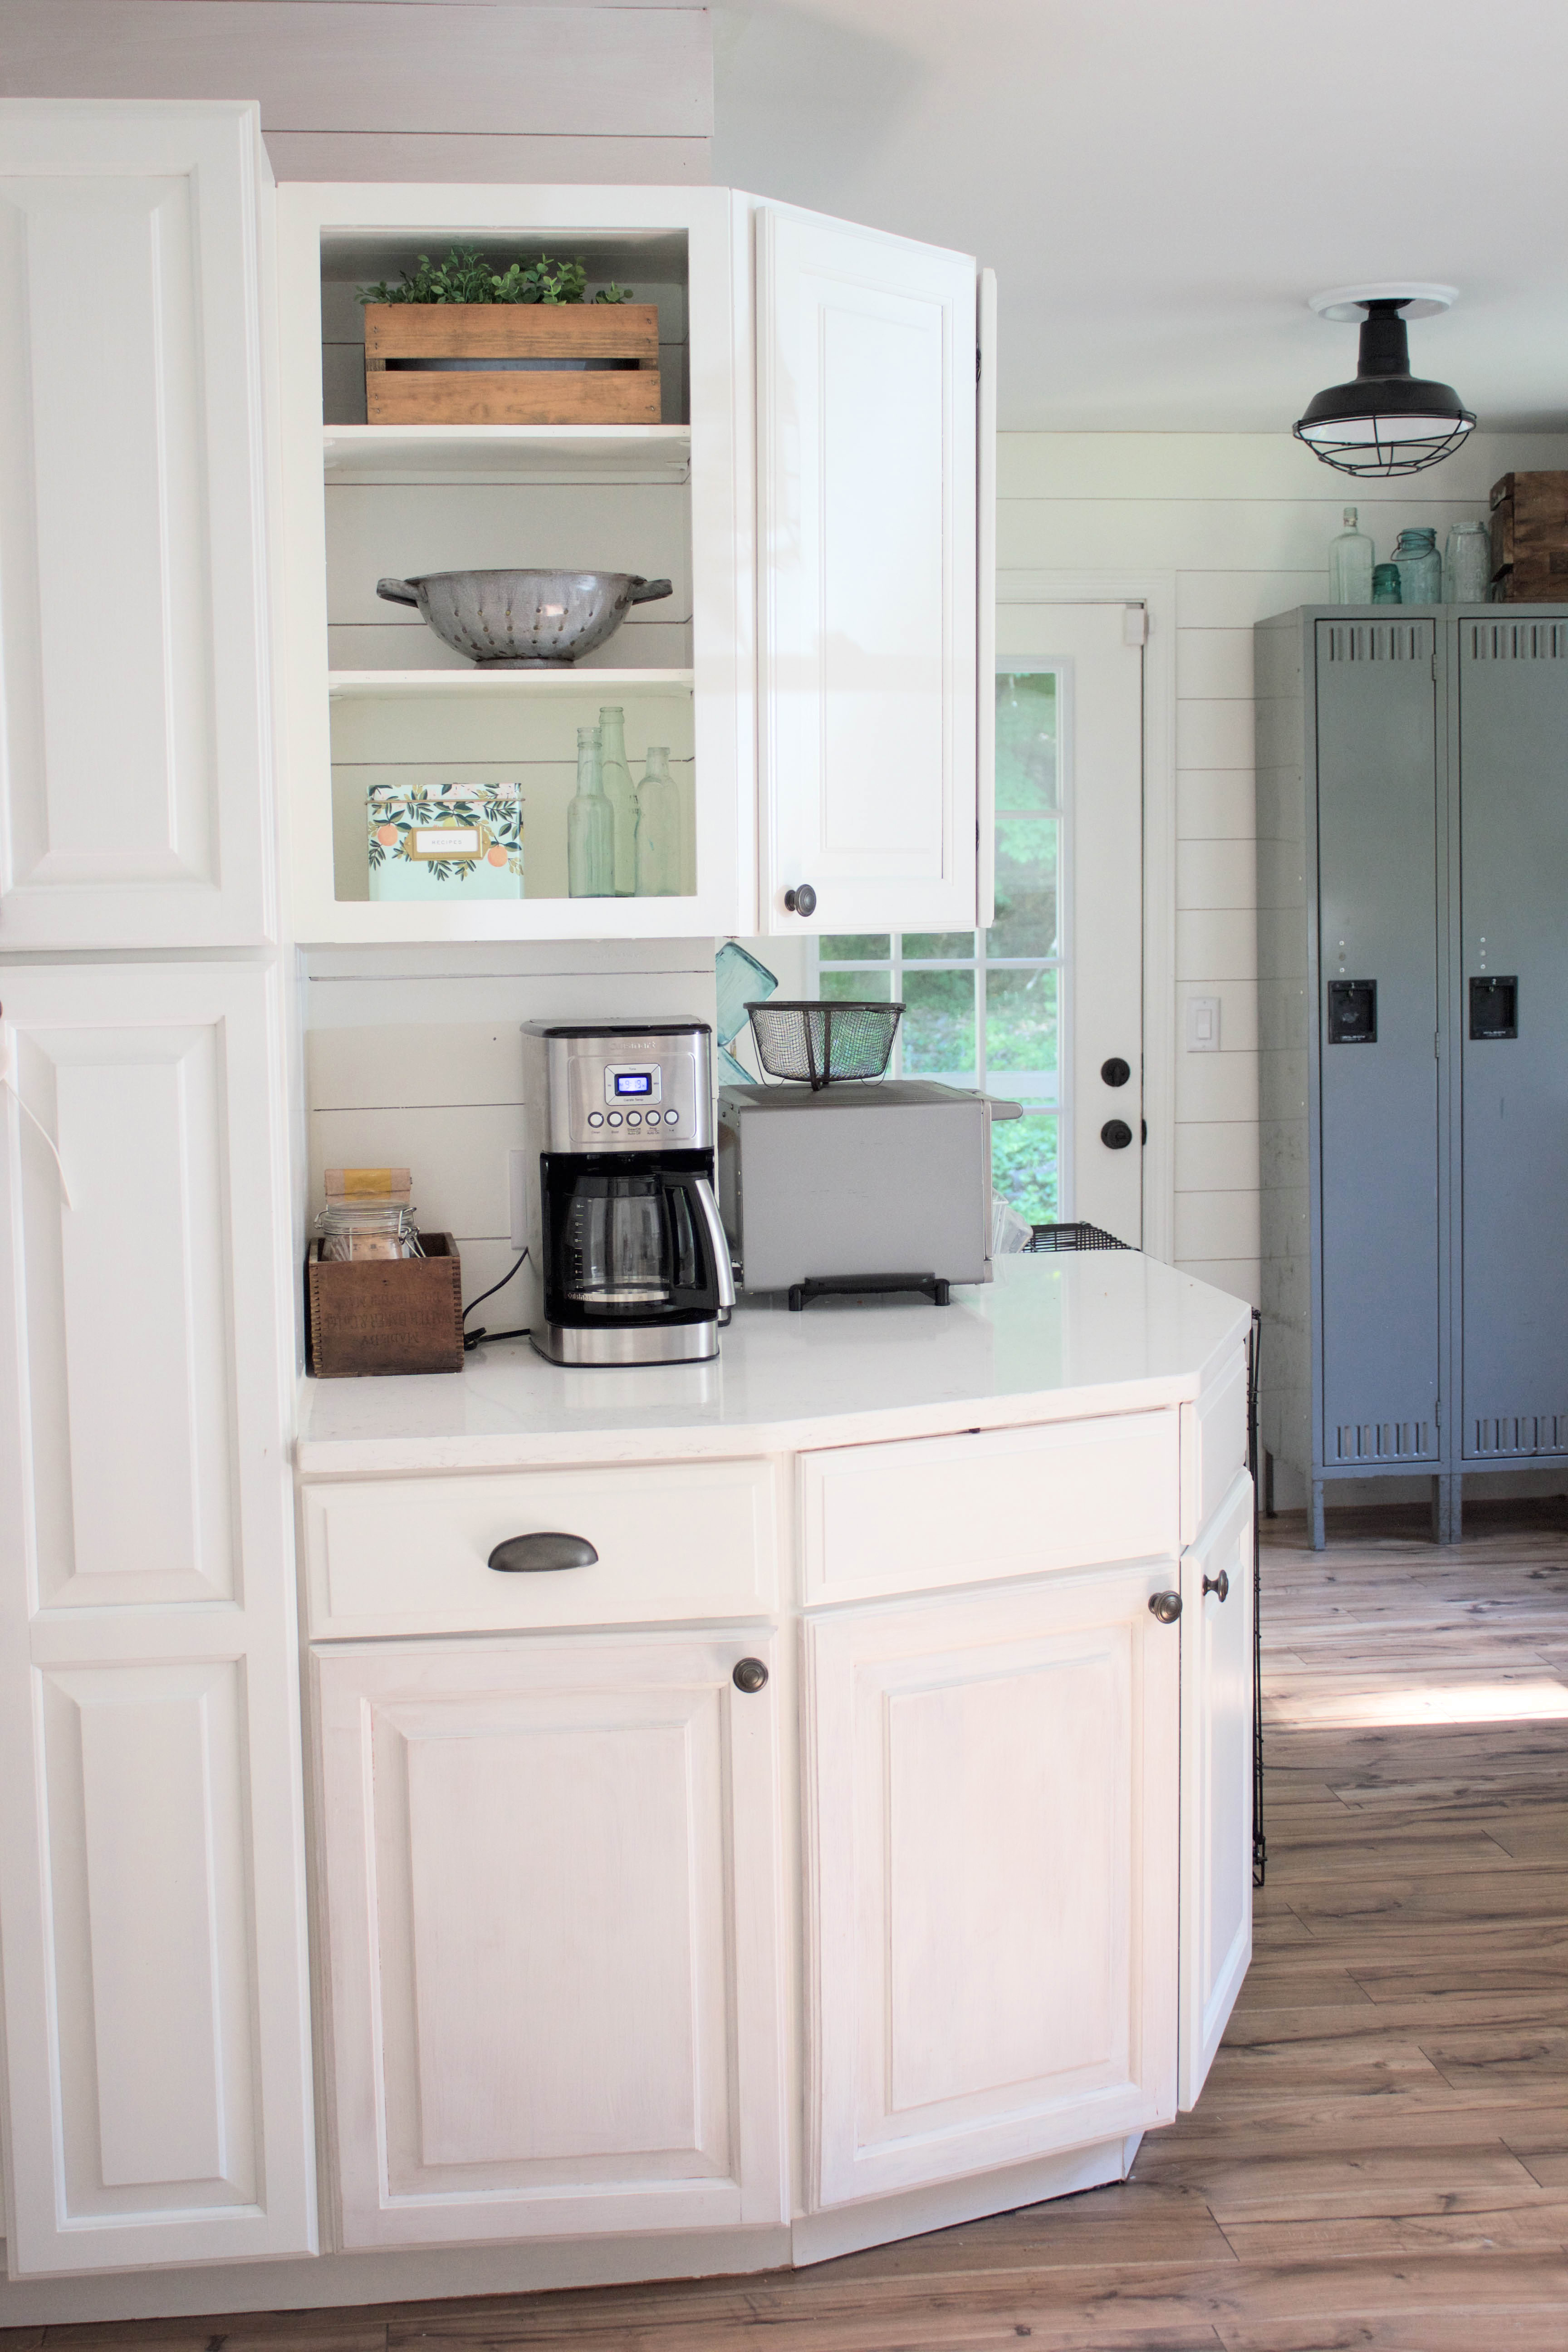
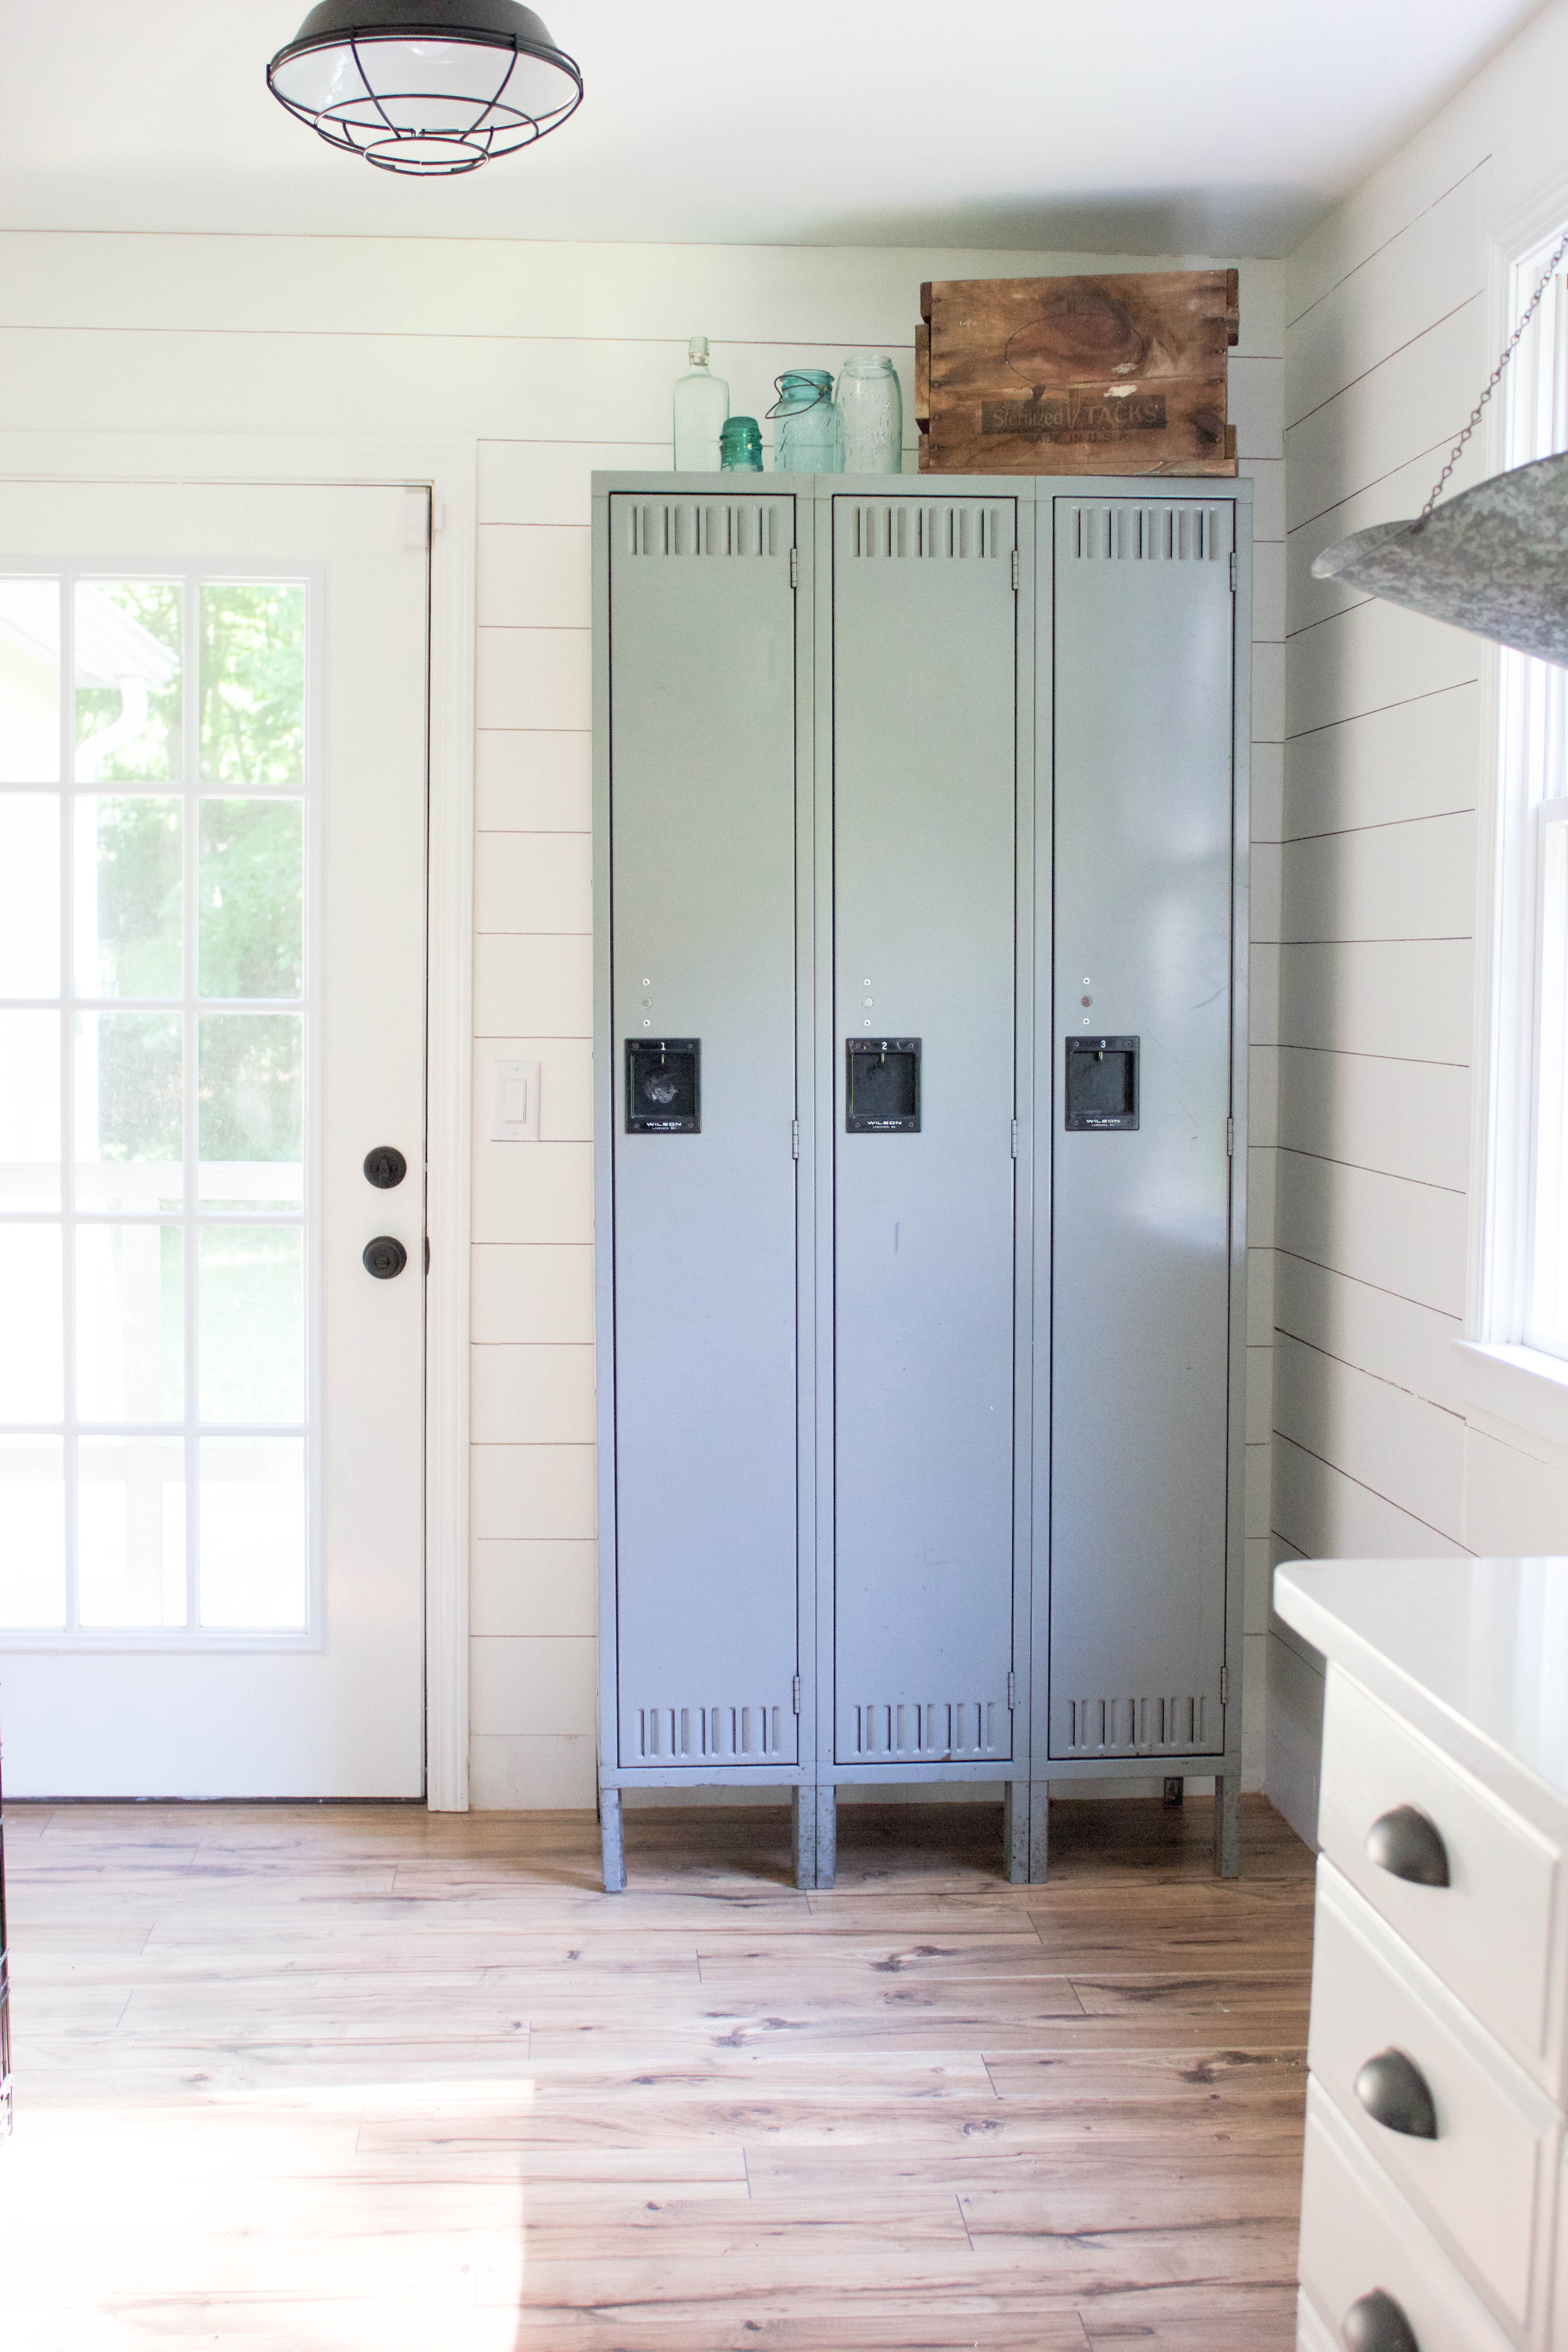
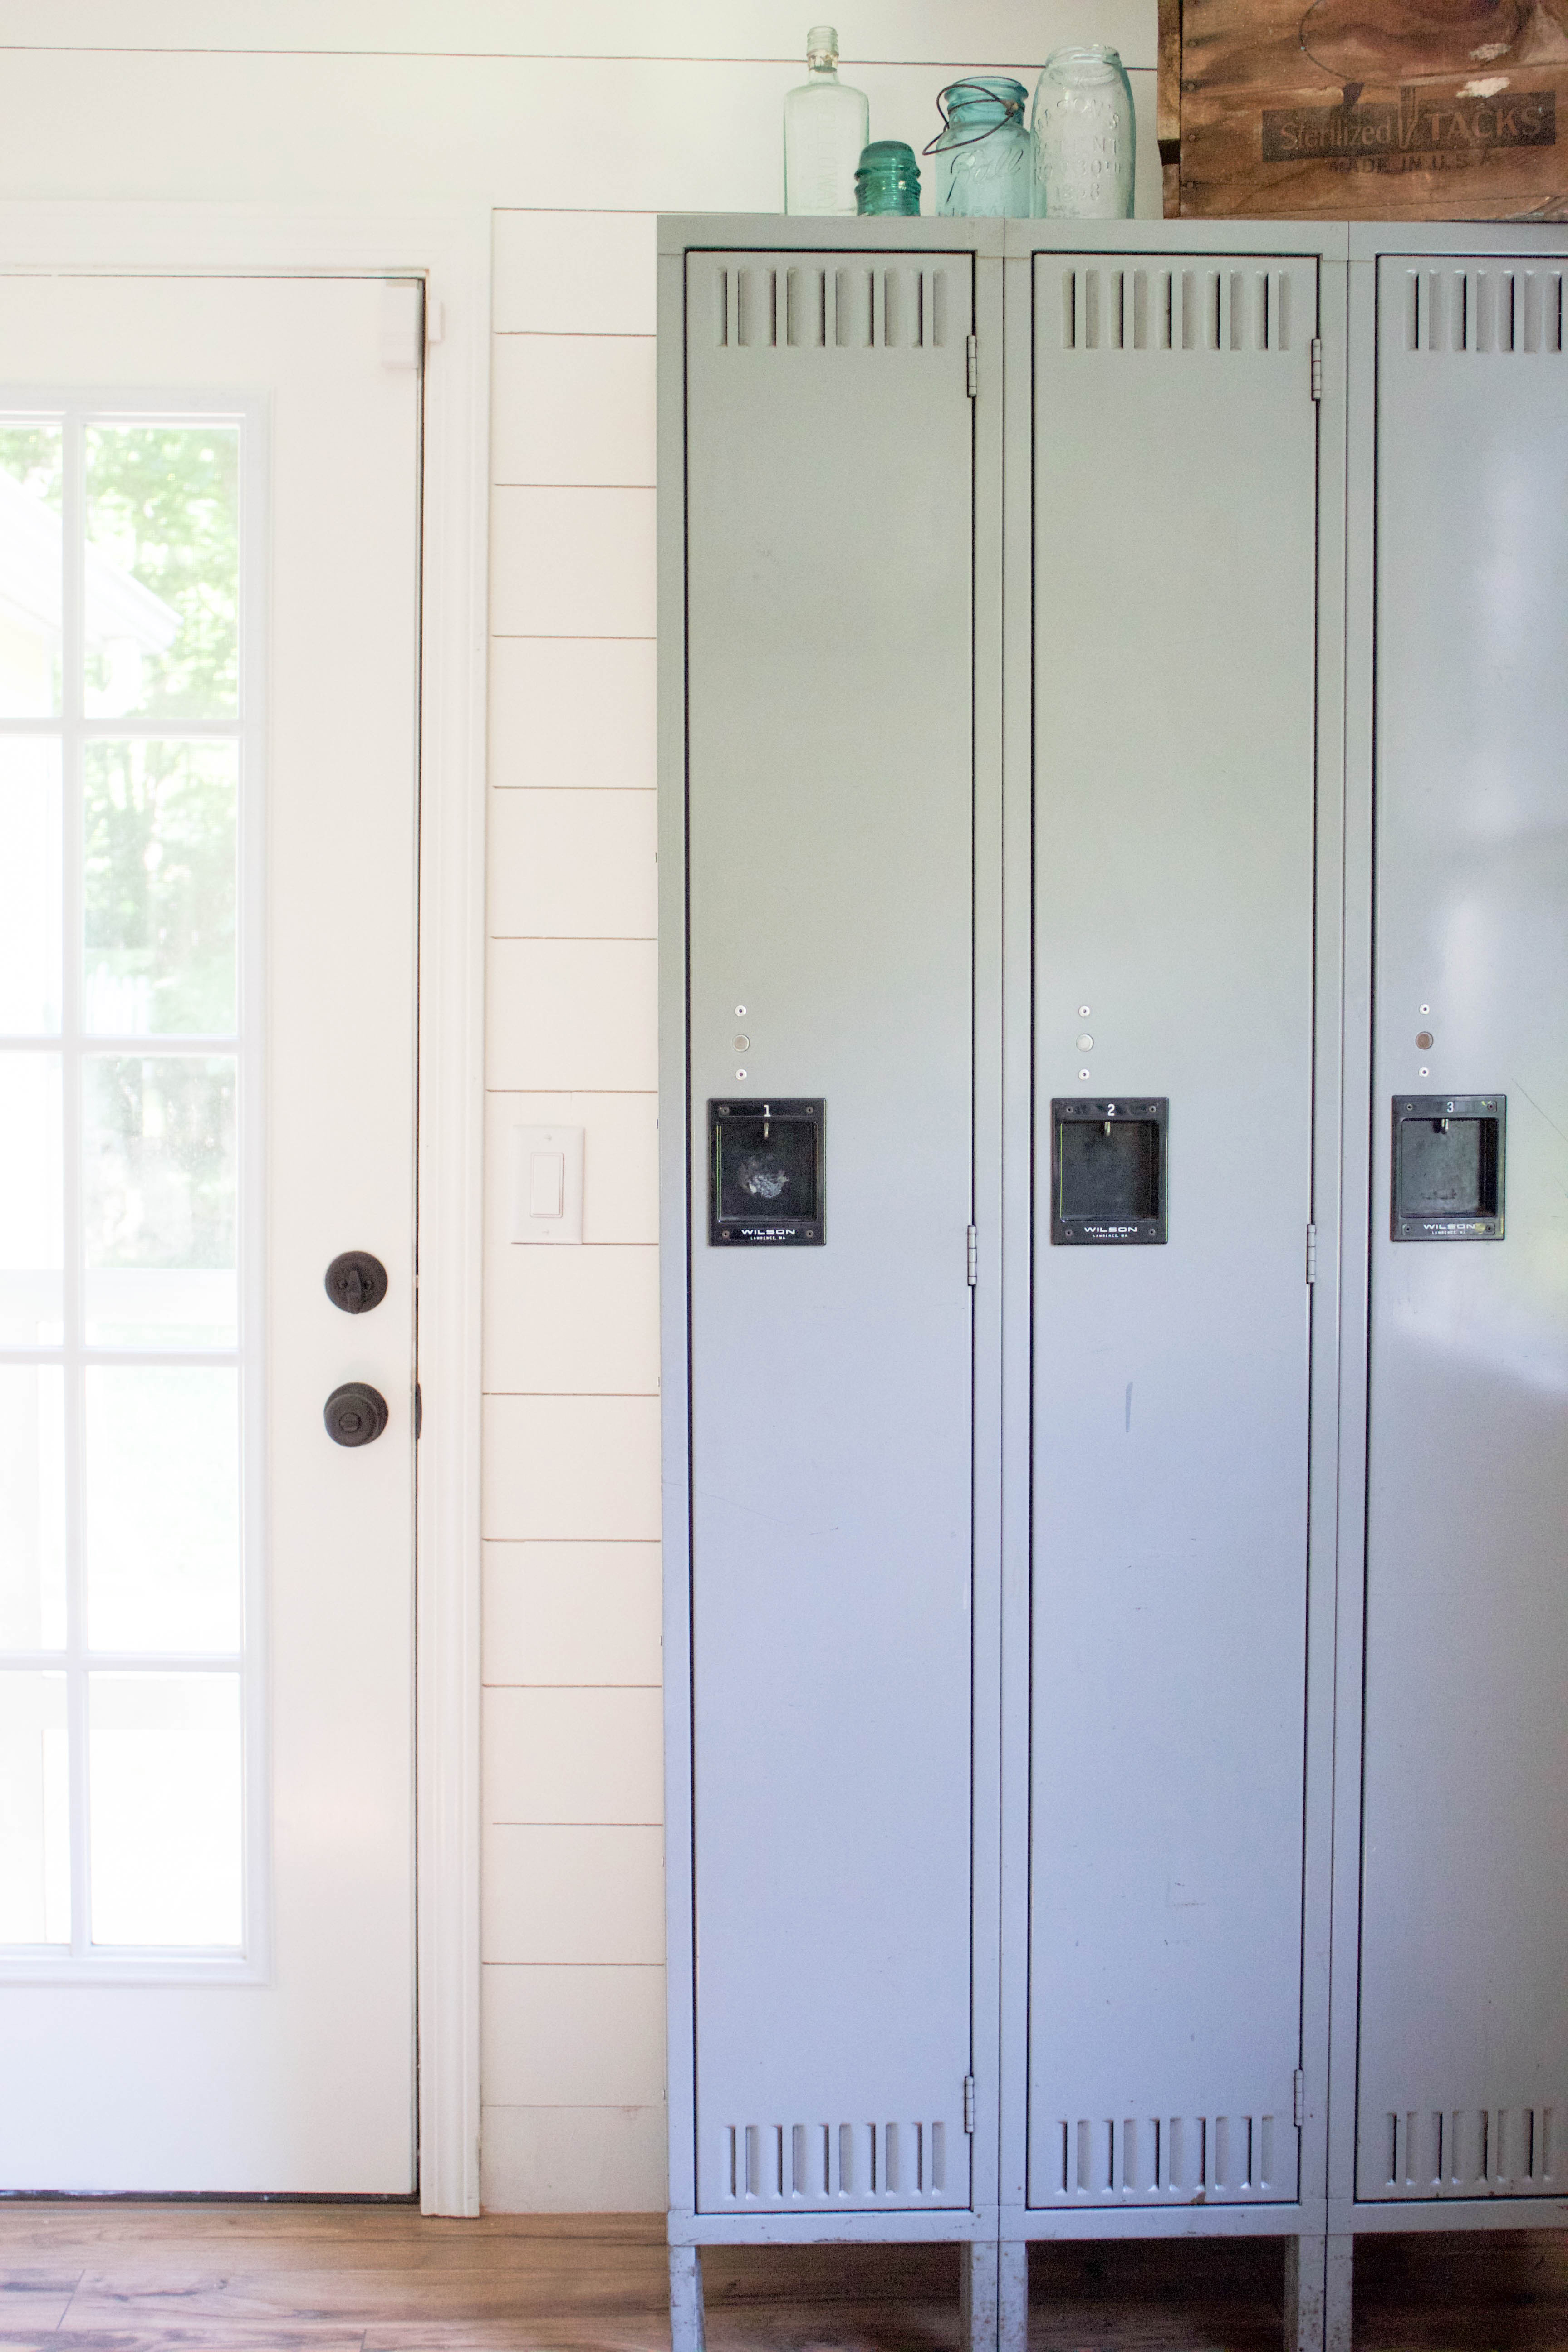
Since we used dark cabinet hardware, I wanted to keep some dark bronze or black accents throughout. This light from Barn Light Electric perfectly ties in the farmhouse theme, and I love the way it looks in this area with the oil rubbed bronze door knob and wall hooks. It’s vintage style is perfect with my vintage lockers too!
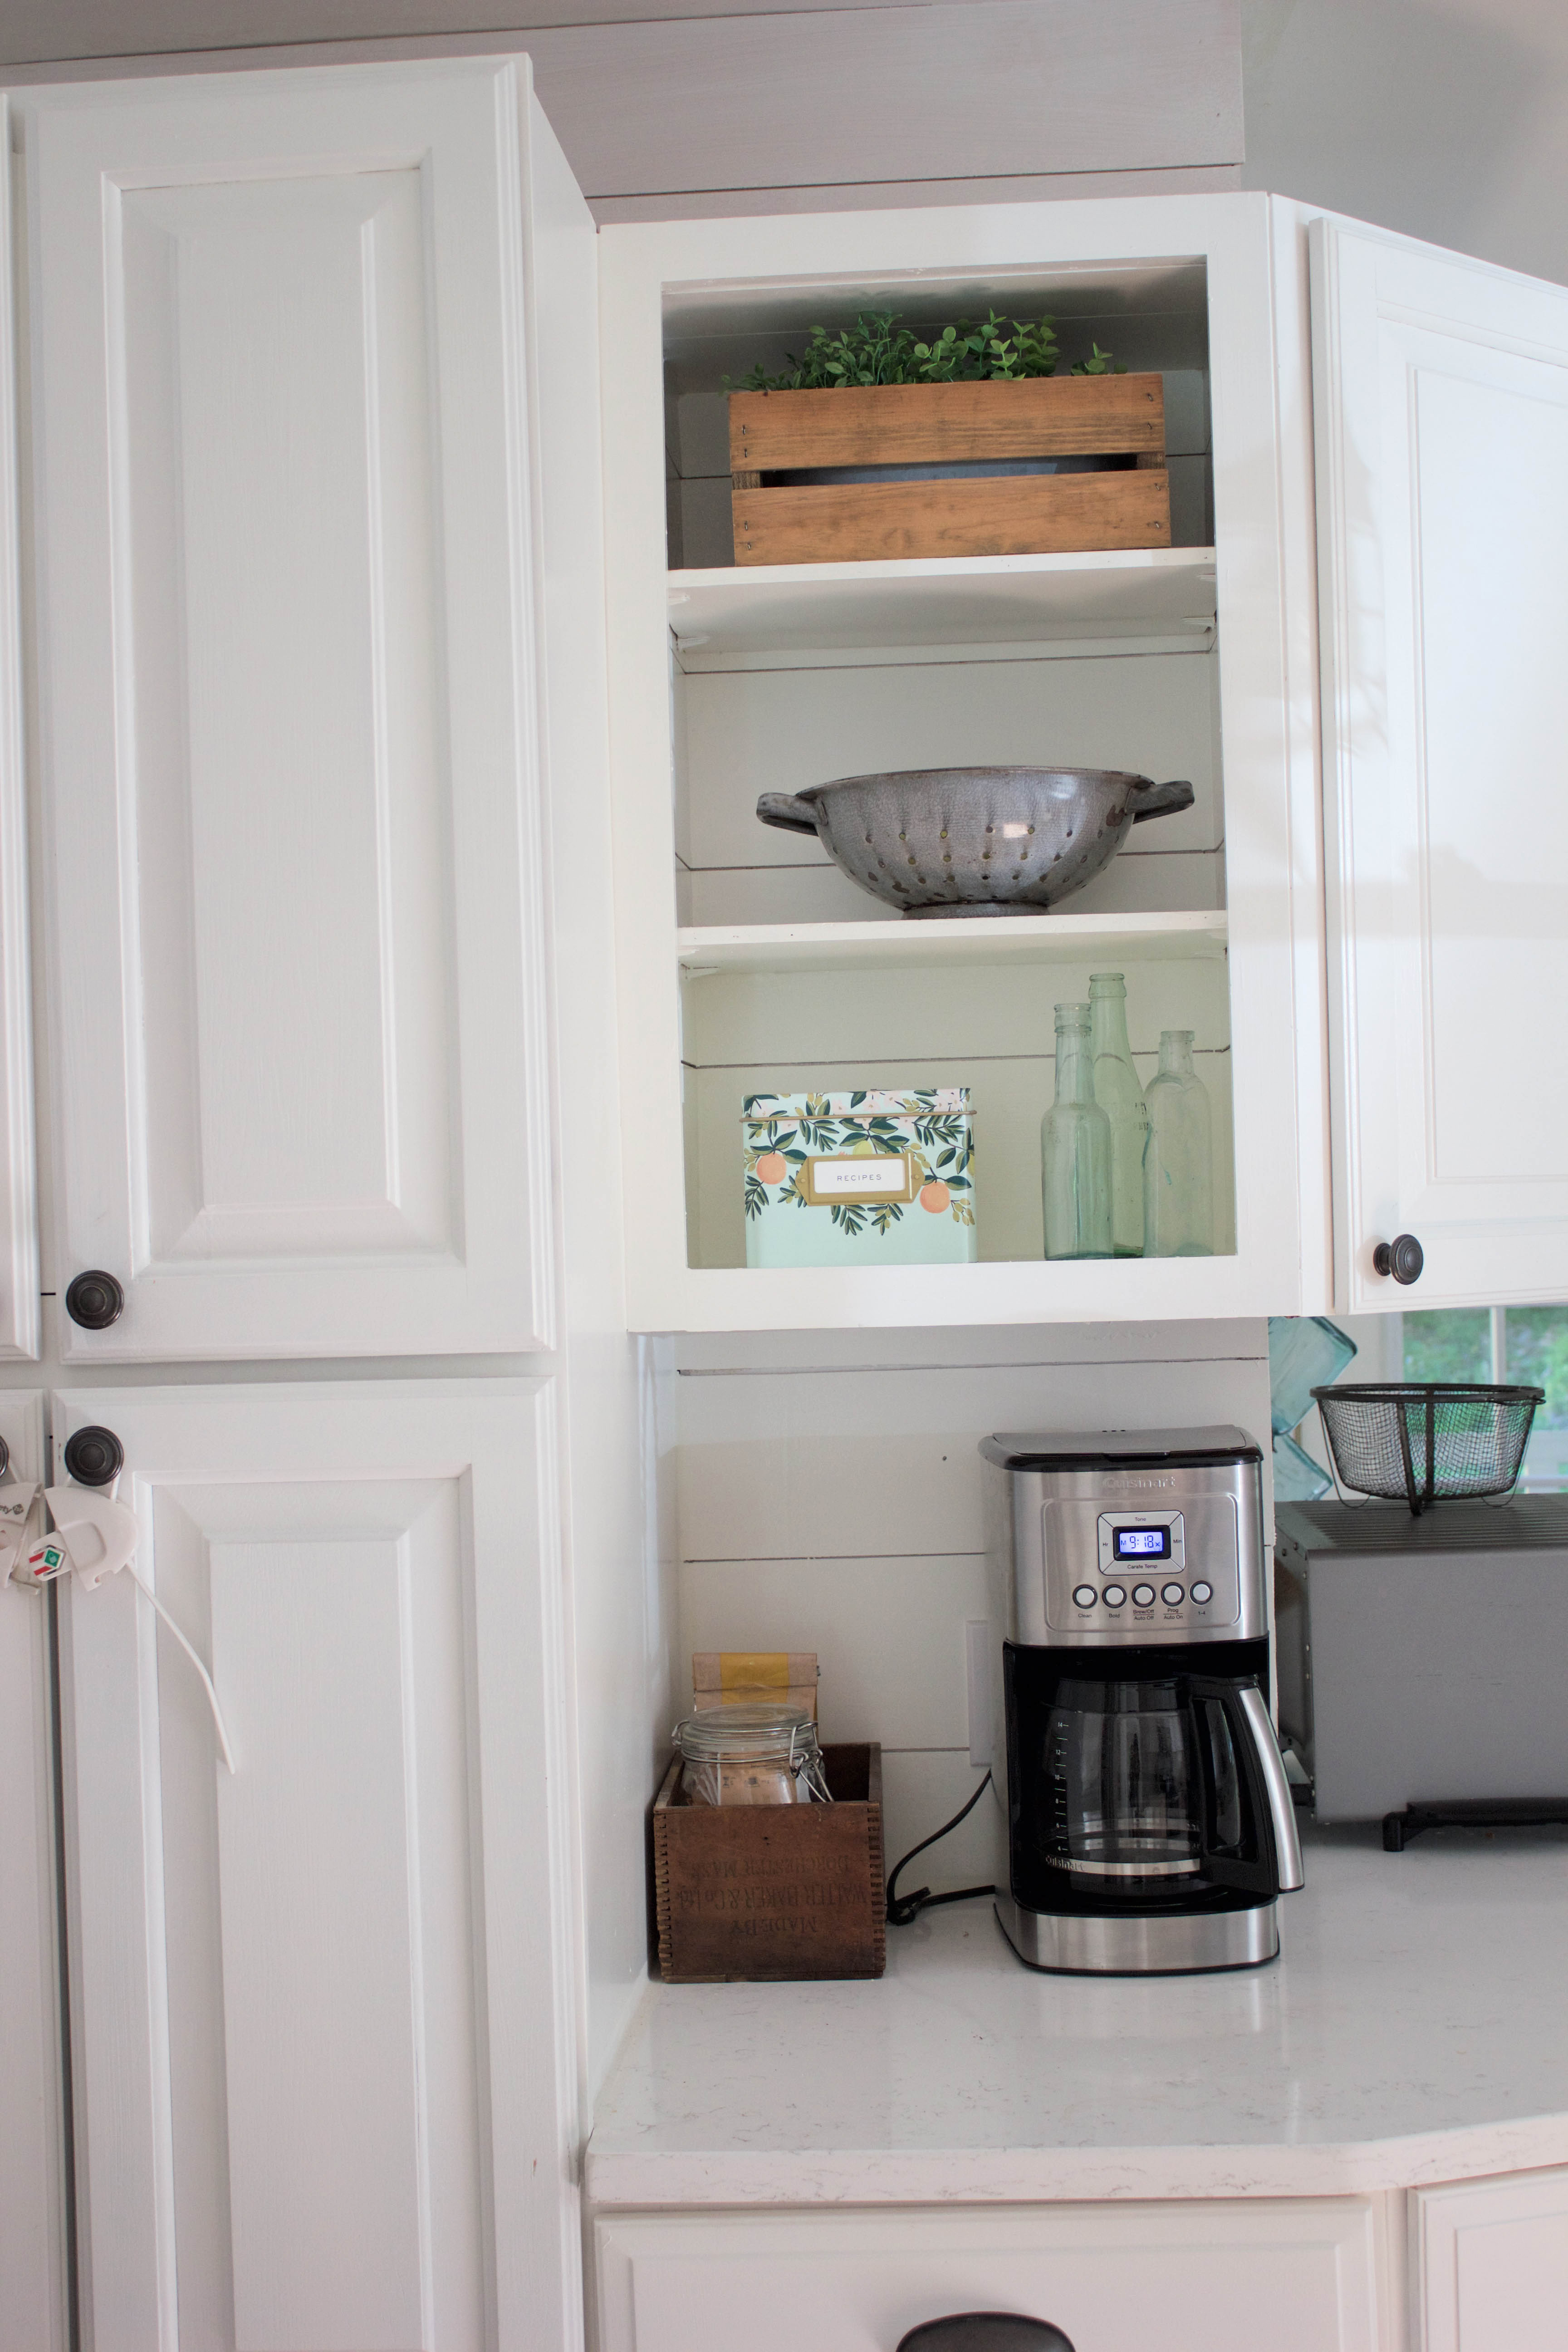
This cabinet used to be a wine rack, which I hated. We removed it and installed some shelving in its place,and now I have a cute little place for some decor.
I wanted to keep little vintage details throughout without over doing it. My vintage lockers are probably my favorite addition. They’re also functional and hold all of our jackets (when in season), bags, shoes, and other odds and ends. All of the junk that once accumulated by the door is now kept in this unique spot.
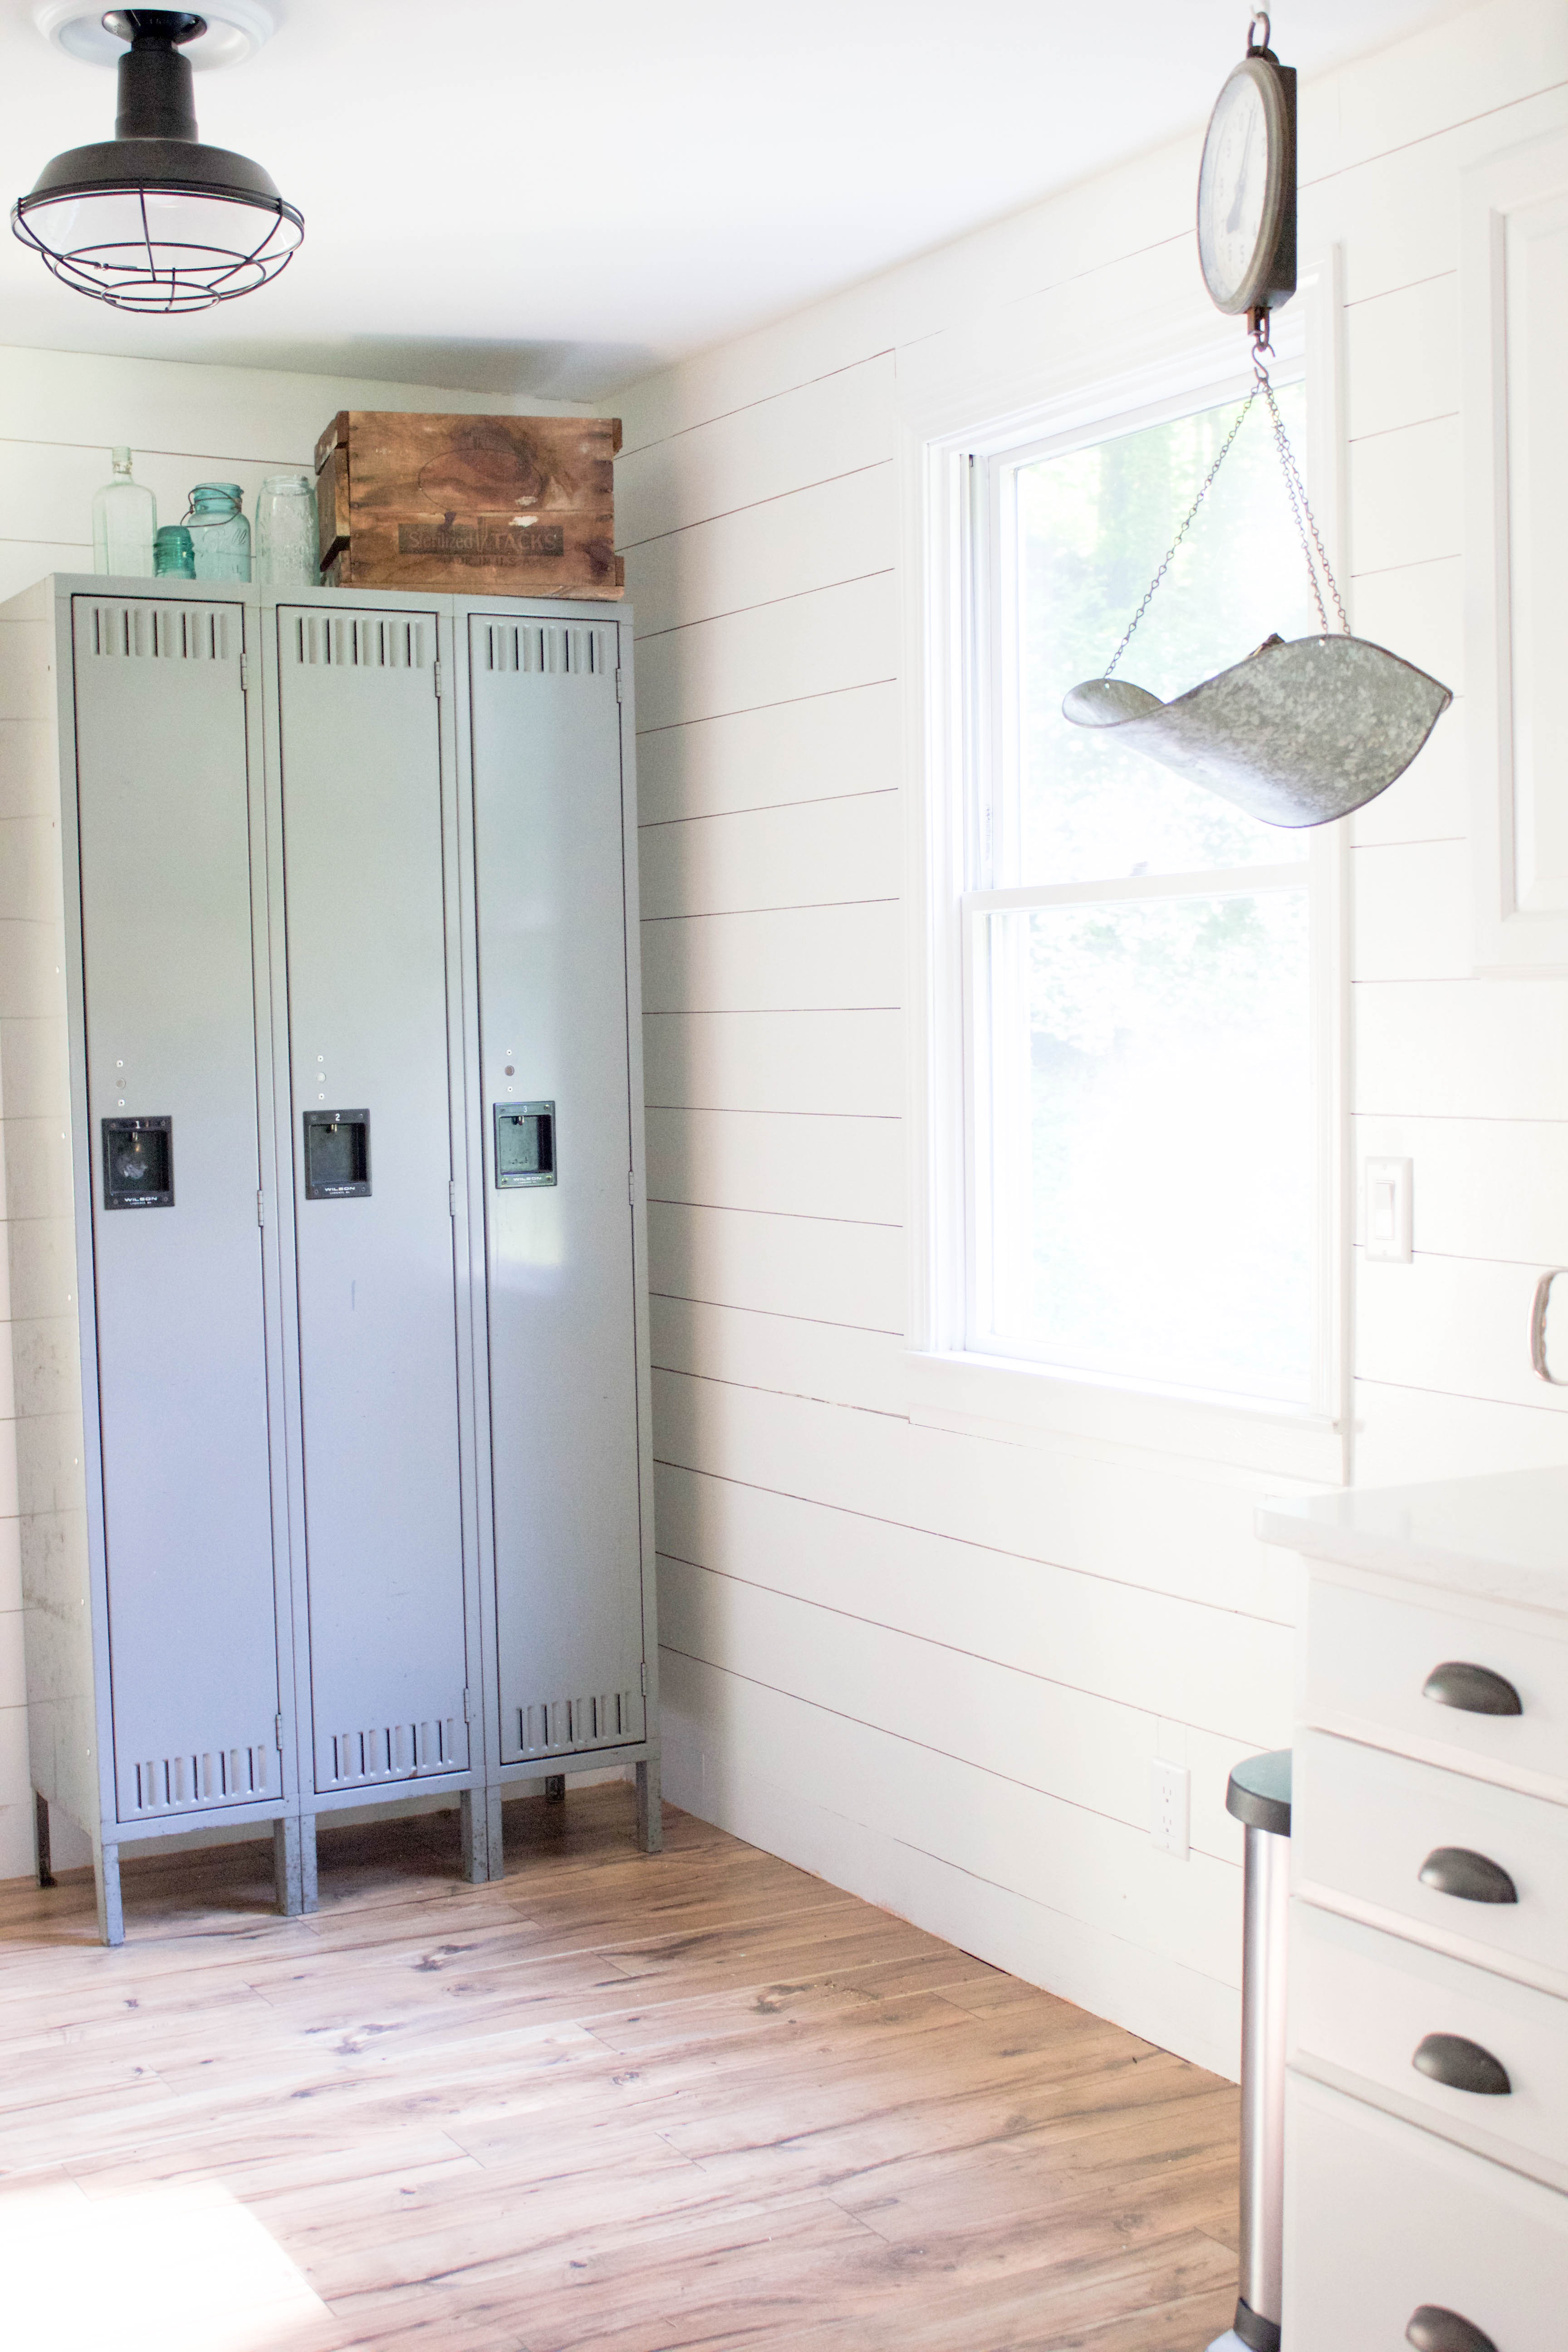
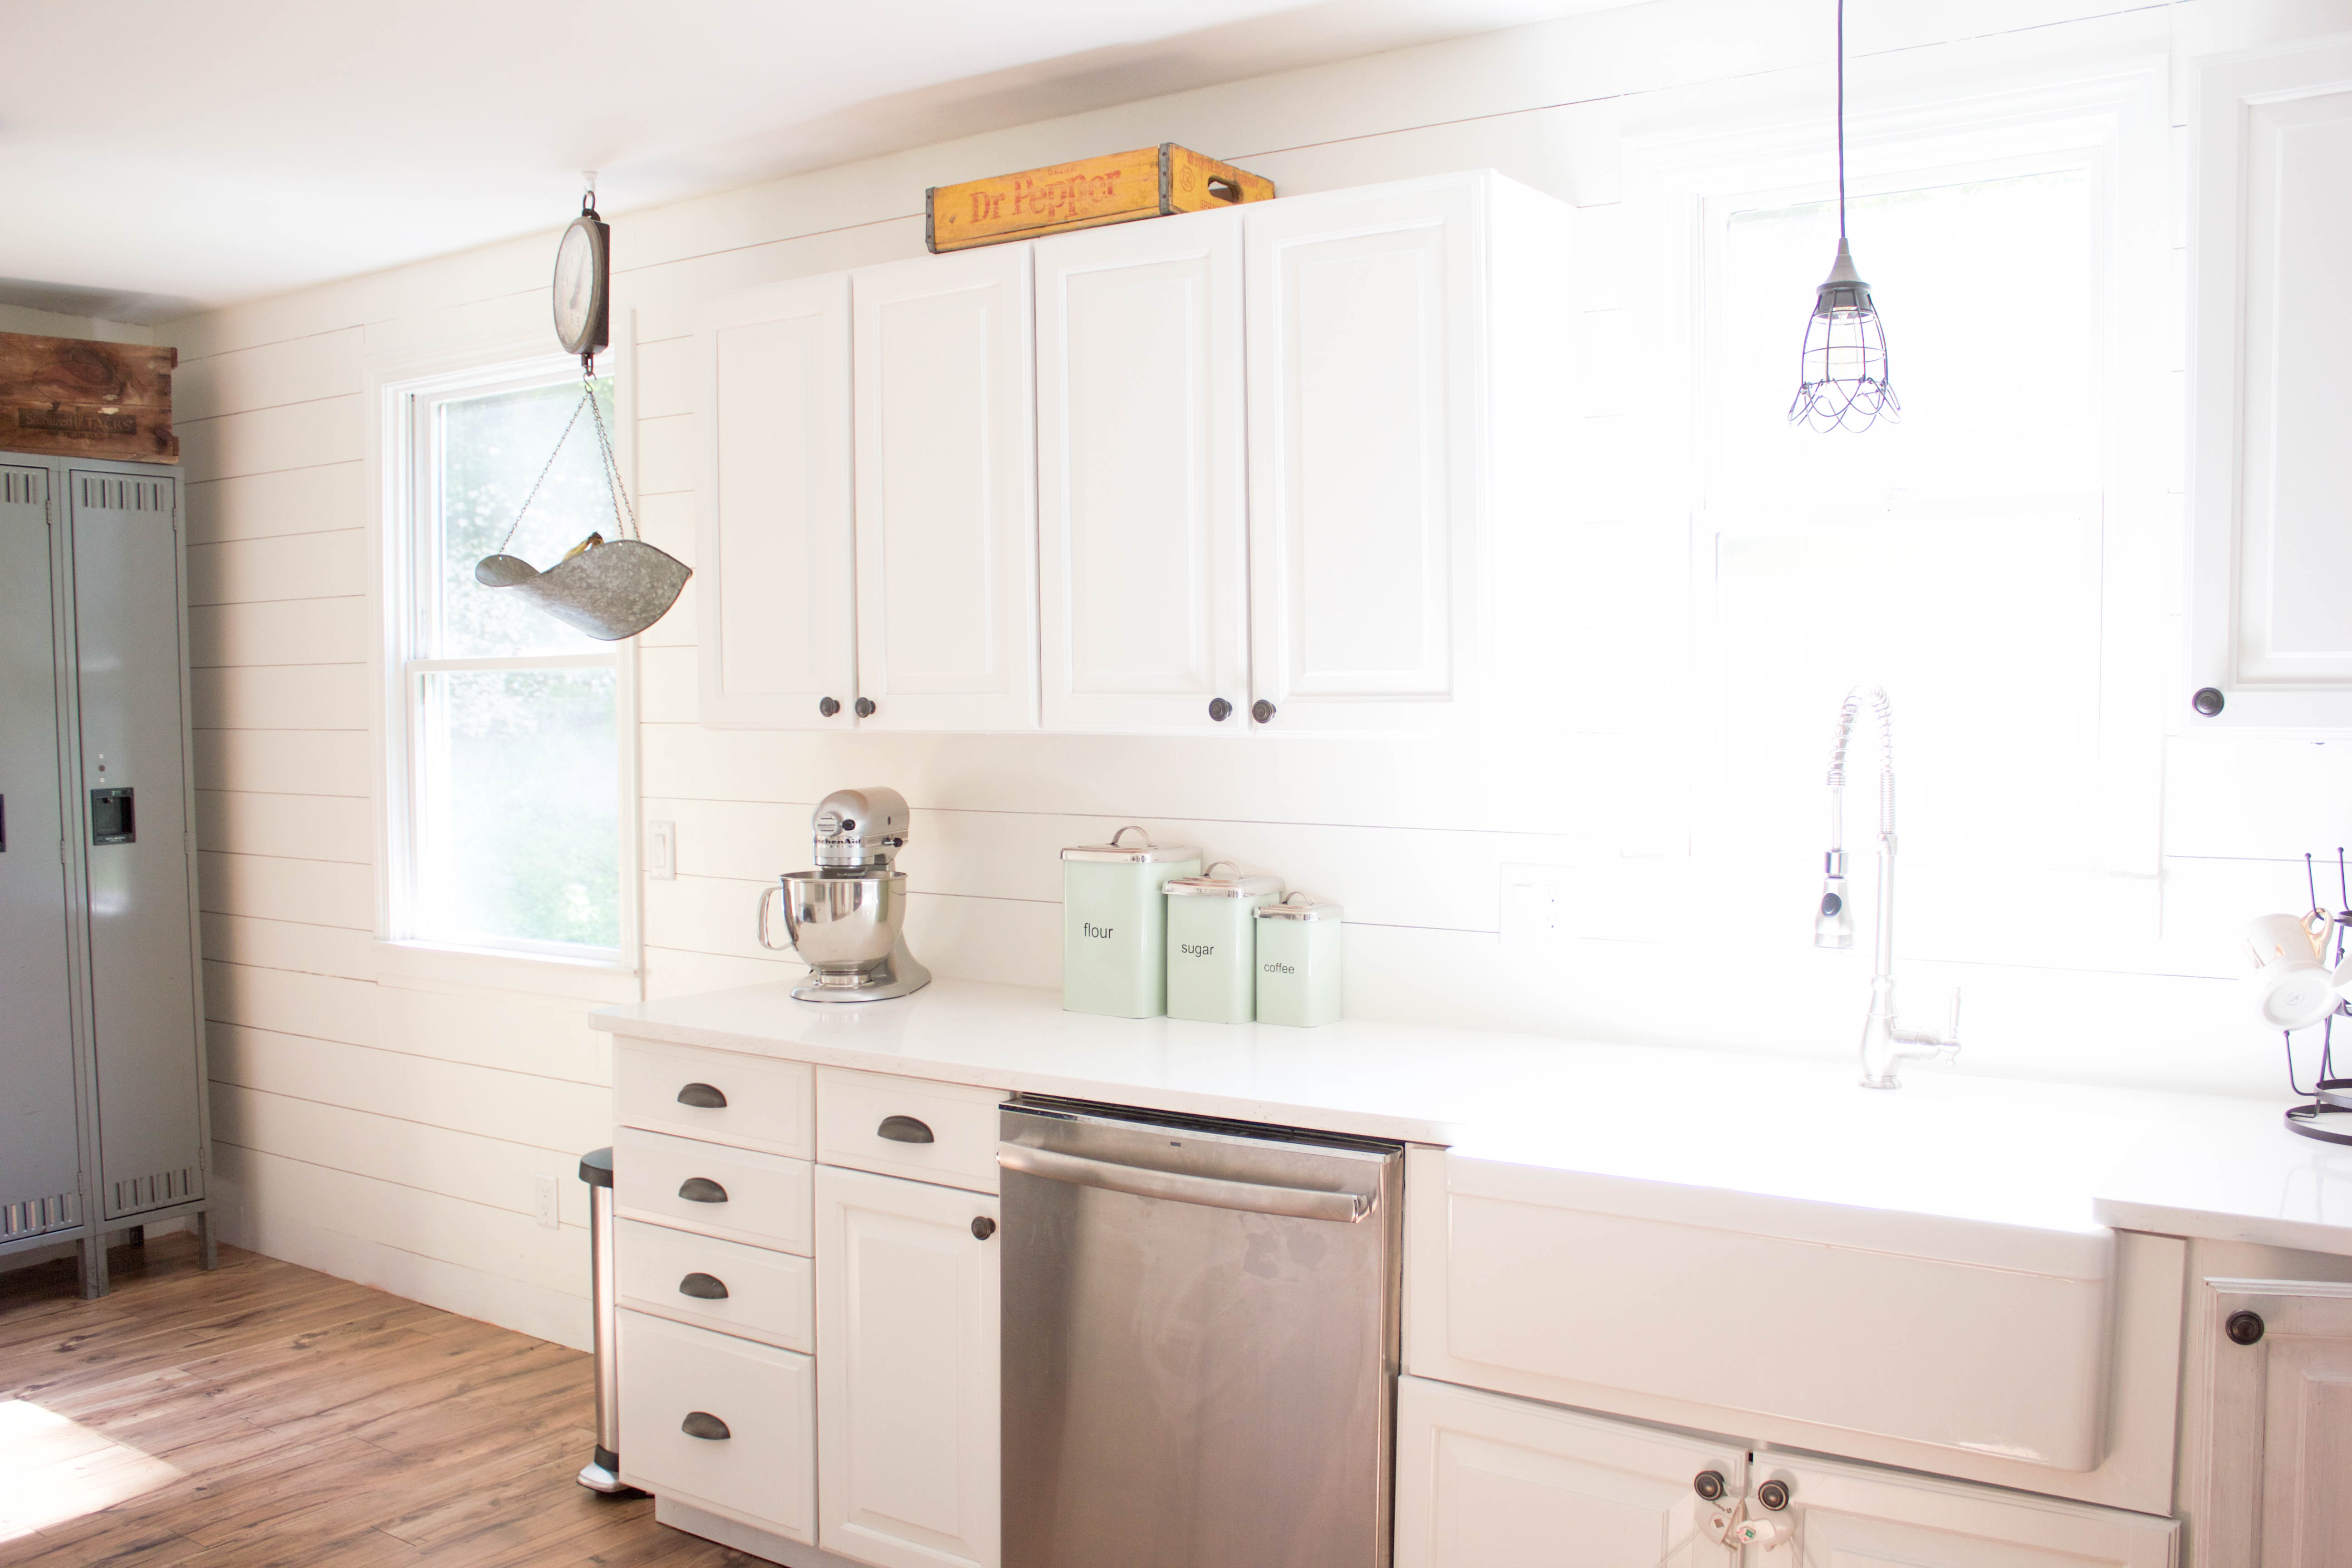
Eventually I would love to extend the cabinets to the ceiling, but in the meantime I threw some of my vintage crates up there. I’m also in love with my vintage scale, which I keep our fruit in. This was a find from a local antique show and I’ve been waiting for the day to hang it in my farmhouse kitchen!
I just love all of the details in our kitchen! It was hard work, but the outcome is incredible. The before and after amazes me every time!

SOURCES:
Flooring: Pergo Providence Hickory
Cabinet paint: Benjamin Moore Advance in Simply White
Countertops: Wilsonart Haida
Faucet: Signature Hardware
Drawer pulls and knobs: Home Depot
Light: Barn Light Electric
Pendant light: Lowe’s
Sink: WayFair
Hanging scale: vintage
Scale: vintage
Glass rack: World Market
Chalkboard: World Market
Hanging glass rack: Amazon
Lockers: vintage
Bottles/crates: vintage
Lantern: vintage
Colander: vintage, @Harperandarrowmarketplace on Instagram
Bakery sign: Wander Ya’ll Creative
Clock: HomeGoods
Canisters: Pier 1 (old)
Wow!!! What an incredible difference! Yall did such a fantastic job with your kitchen, I love it!
This is absolutely beautiful! I love the new mixed with vintage. I also love that you simply painted your old cabinets. They look brand new!! Awesome job!!
You should definitely extend them to the ceiling! I bet you would be surprised at how non-expensive that is. Unless you want functional storage it’s just a bit of custom millworker.
I think you should definitely extend the cabinetry to the ceiling! Unless you want functional storage it’s just a bit of custom mill work, I highly doubt t would cost you much at all. Magen we did our kitchen there was no cost difference between getting mill work for a ceiling height look and not getting mill work. Beautiful design either way!
We’re in the midst of doing a shiplap project and I’m leaning towards painting it white. What color did you paint yours in your kitchen?
Benjamin Moore Simply White 🙂
WOW!#Amazing How nicely you decorated your ideas with us.I have gone through you post and really liked these ideas for kitchen renovation.Thanks for such a nice article.I also deal with the flooring company in Aliso Viejo California that have professional flooring contractors.
Your kitchen looks amazing! I love the idea of using the shiplap as the back splash as well. However my only question is how do you take care of water on the counter and possibly onto the shiplap by the sink? Same thing by the range – oil splatters etc.? IF you could give me some insights, that would be awesome. Thank you!