Home // DIY Photo Frame February 17, 2017
This is a sponsored post written by me on behalf of Fujifilm Wonder Photo Shop. All opinions are 100% mine.
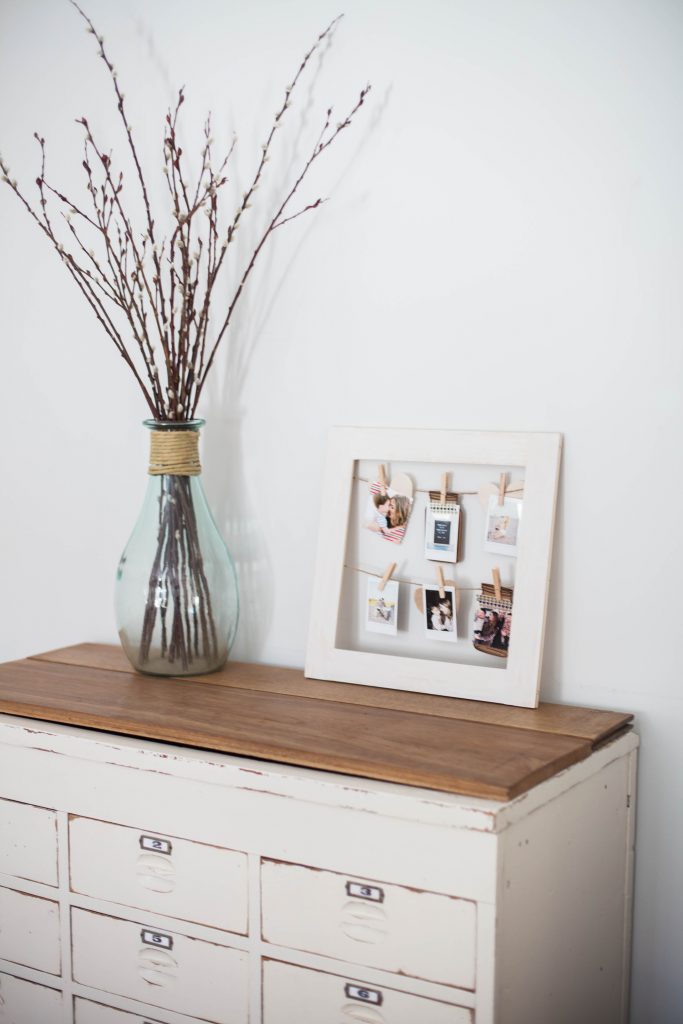
I recently had the opportunity to visit the Fujifilm Wonder Photo Shop in NYC and teach a DIY class for Valentine’s Day. You might’ve seen me post about it here, but I wanted to share a little about what we did in case you missed it (since not all of you are local to NYC!). We created a simple photo frame to display photos of our loved ones for Valentine’s Day, but I love that this project is really customizable to any and all occasions. It’s also really great to do with kids, too! For the sake of this post, I’m nixing the Valentine’s Day theme and making a generic, year round frame. 🙂
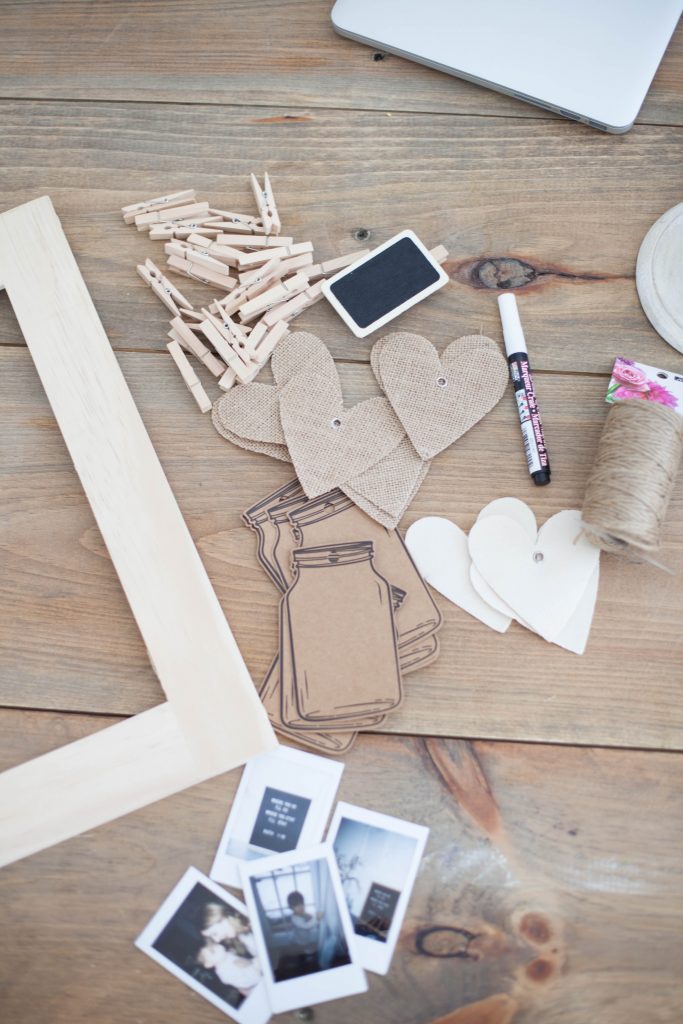
SUPPLIES NEEDED
- Open frame (no glass)
- Ribbon or twine of your choosing
- Stapler or hot glue gun
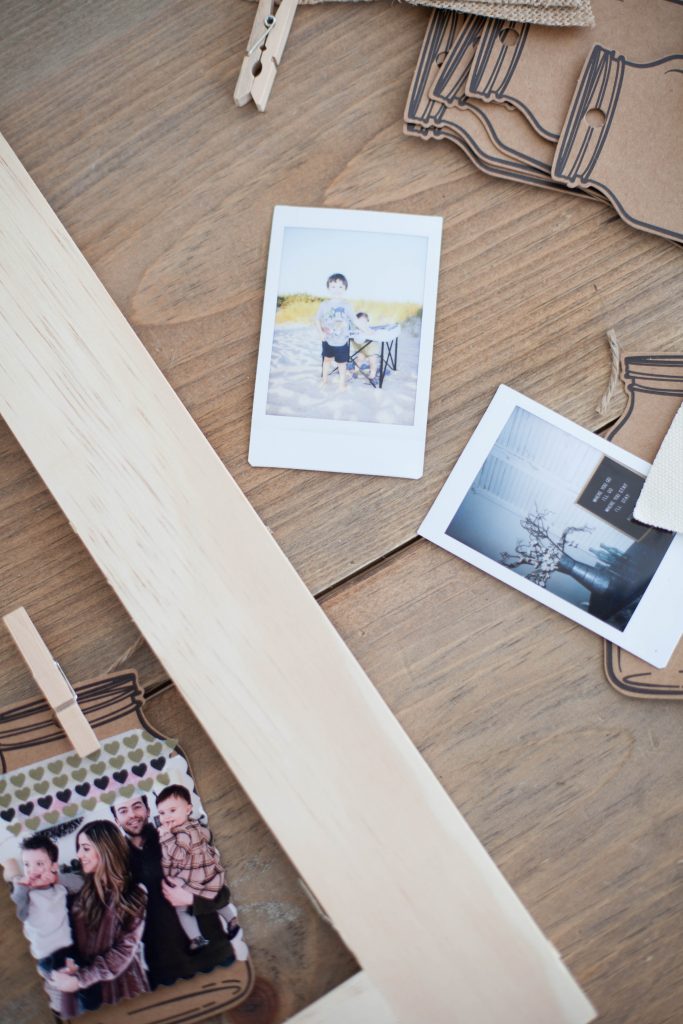
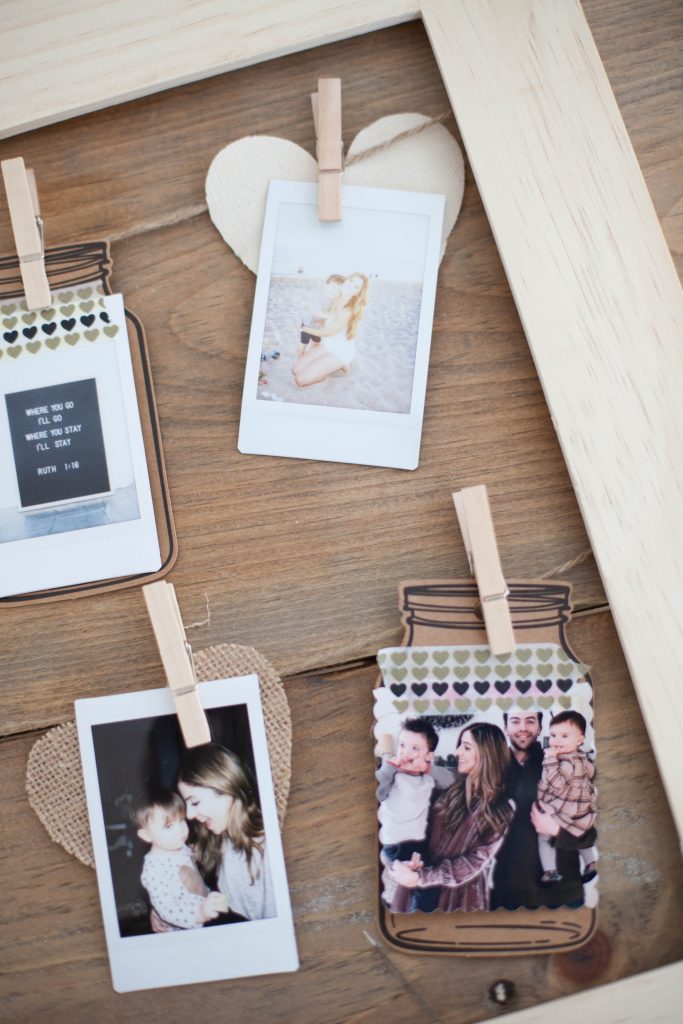
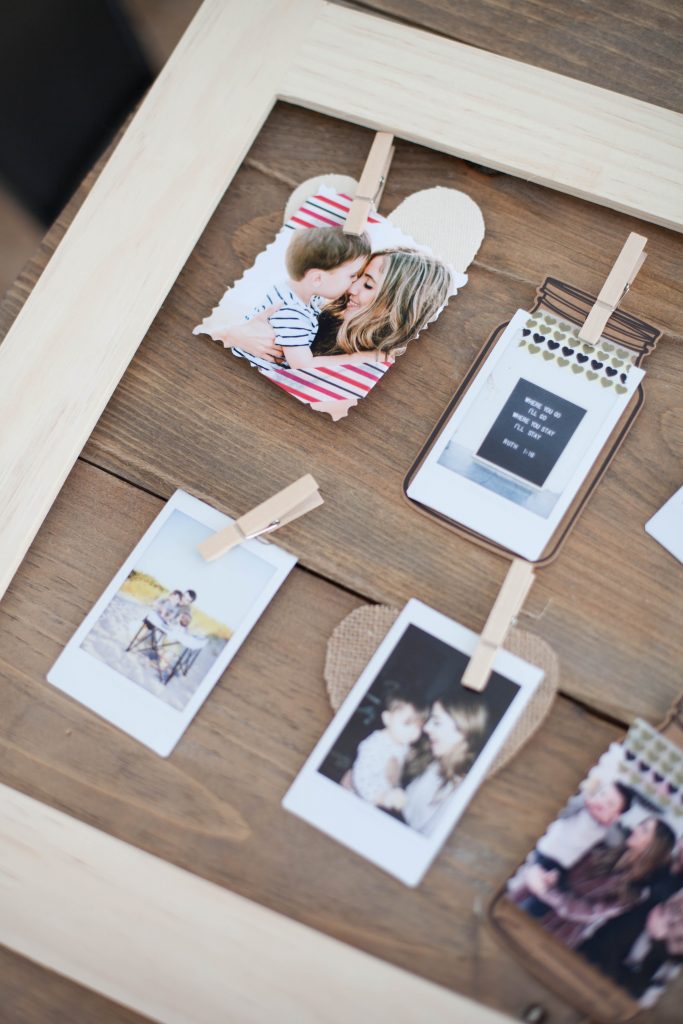
- Photos (I used my Fujifilm Instax camera!)
- Clothespins, scrapbook paper, doilies, washi tape, and whatever else you’d like to decorate with from your local craft store.
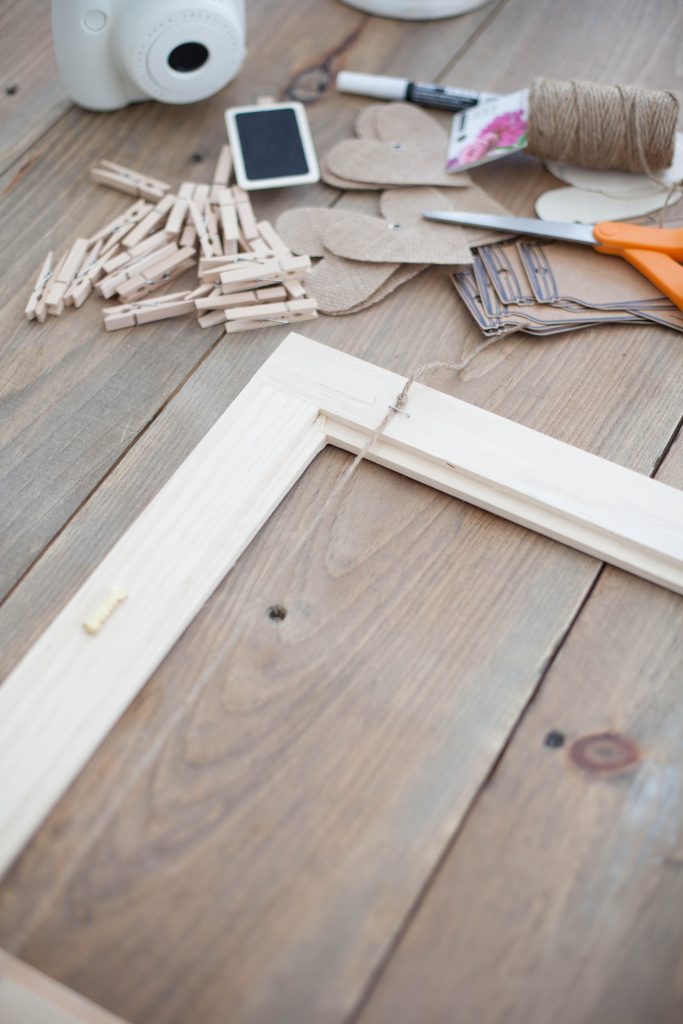
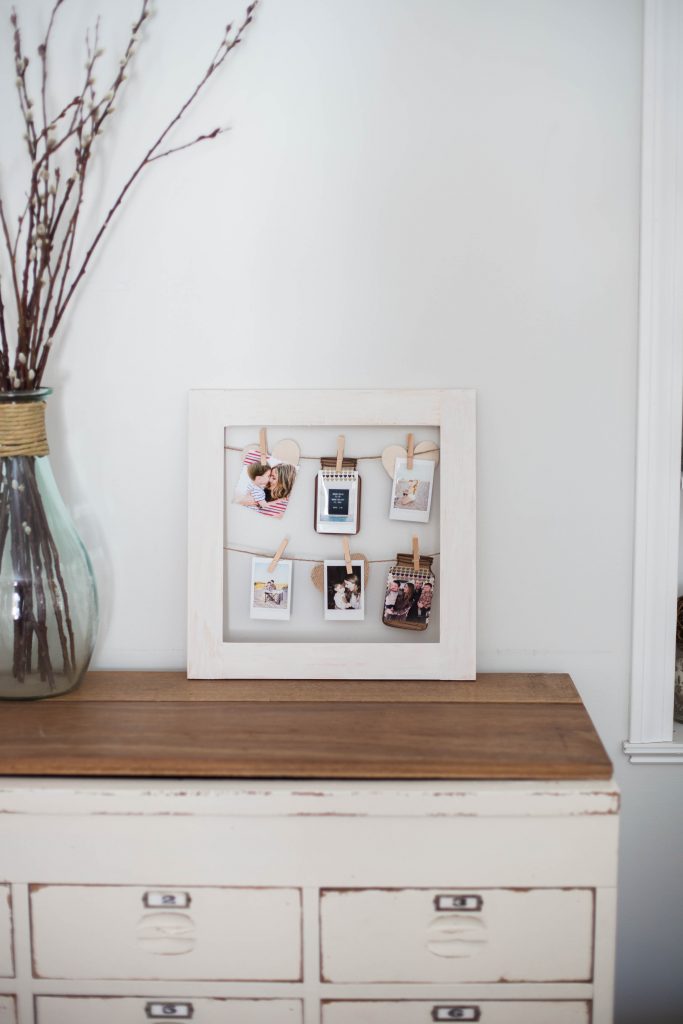
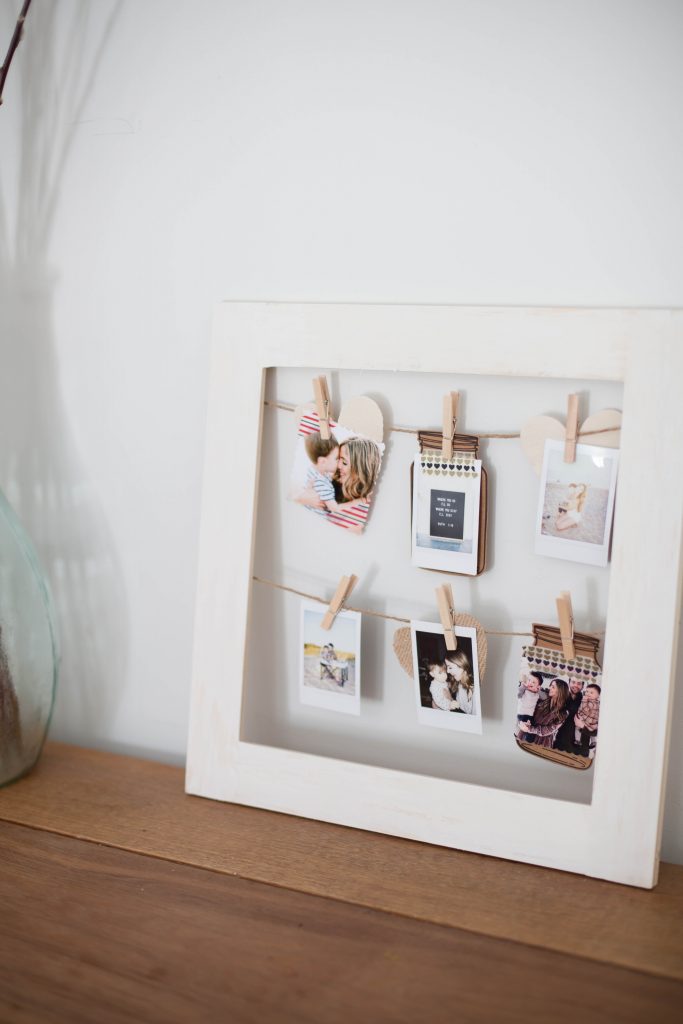
I picked up some simple frames for the class, but you can use any frame you have on hand. I suggest a larger one so you have more room for displaying photos, but the ones we used for the class were a simple 12×12. I picked them up at my local craft store for less than $15. Using a vintage frame would be fun, too!
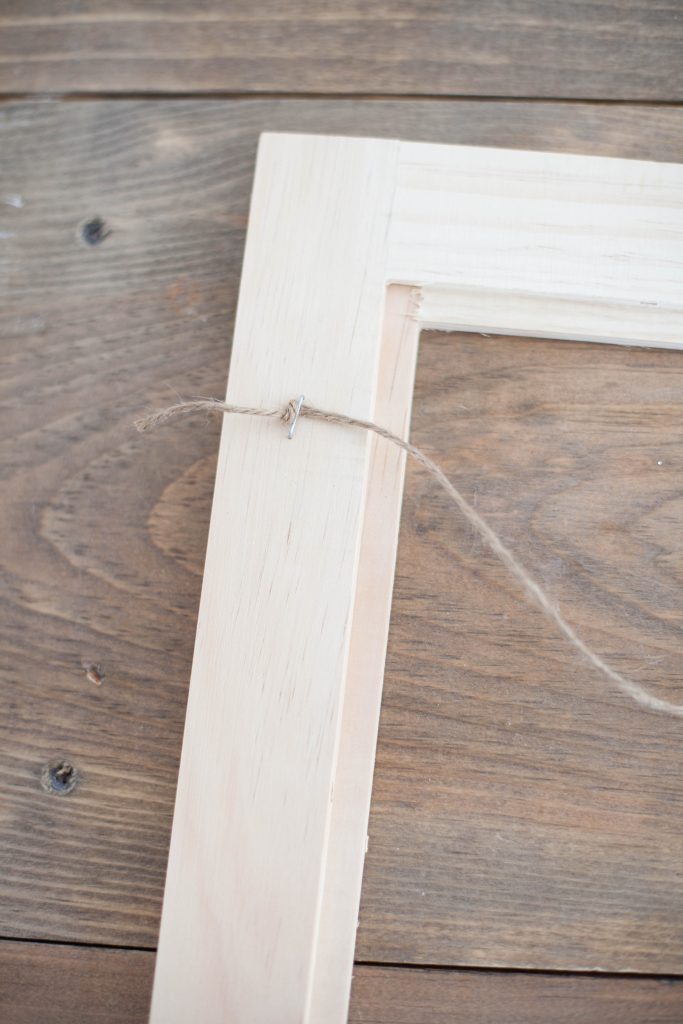
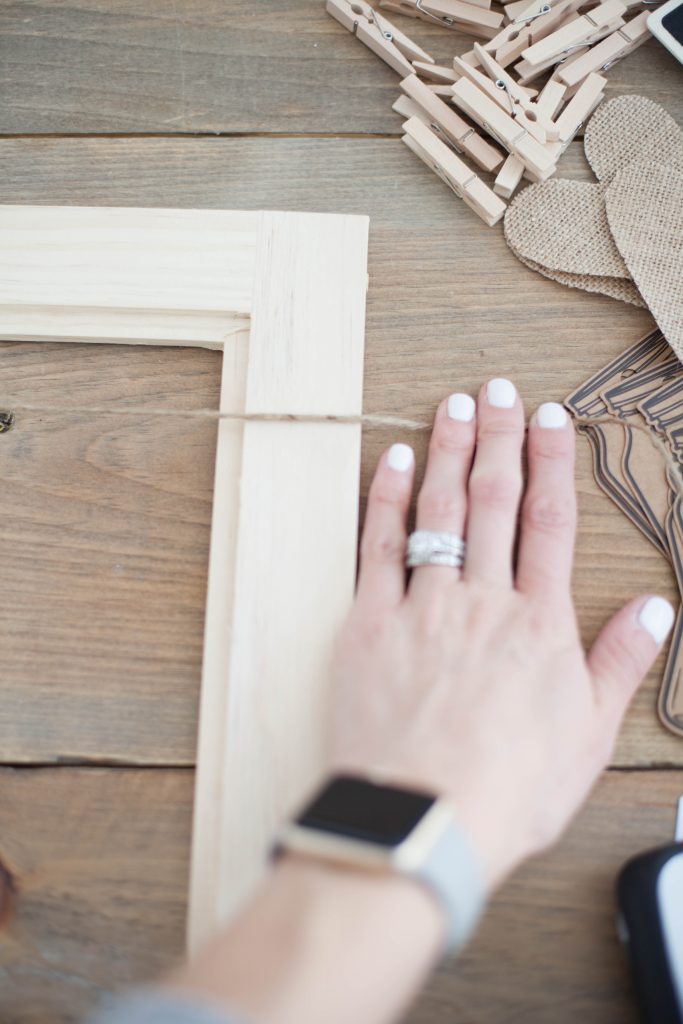
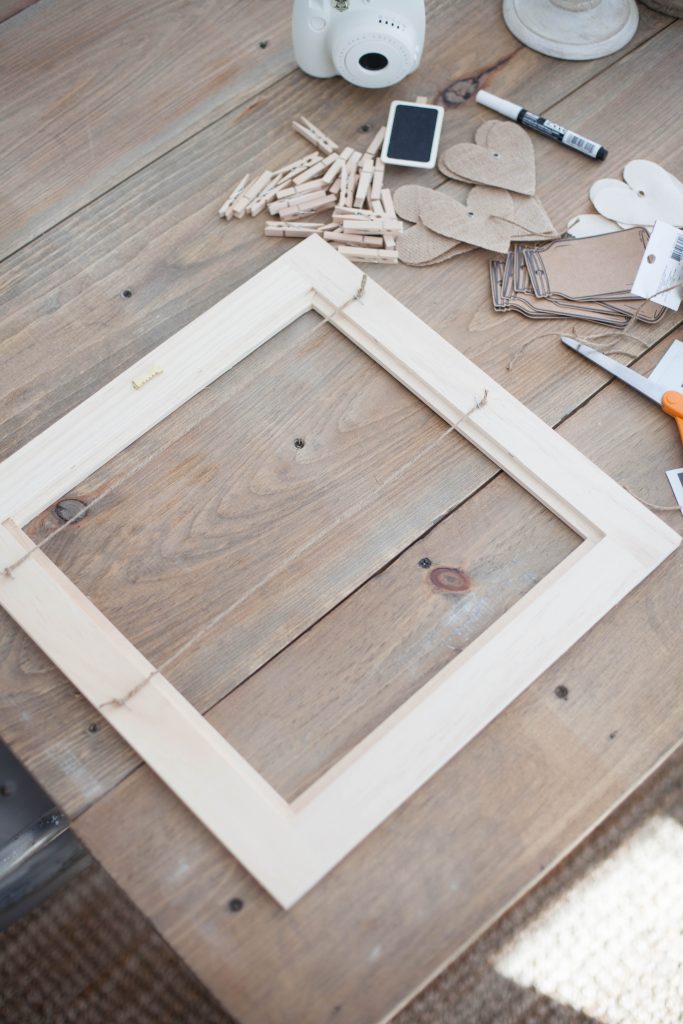
Select the ribbon or twine you’ll be using, and measure out the appropriate length for it to lay across the frame. I like to add a couple of inches of wiggle room to each end. Any excess can be easily cut off. Once you have the twine in place and at the desired height of your choosing, staple or hot glue one side to the back of the frame. Form a knot with the part of the twine on the outside of the frame so it won’t slip out of the staple. If using hot glue, you can skip that step as the glue should hold it in place! Holding the end of the twine that’s not stapled, make the twine taut. Repeat the staple/knot process on this side. Trim off any excess twine. You can now repeat this until you have as many rows as you desire (only 2 in this example).
The hard part is done! Now is the fun part. Get creative with how you want to display your photos. I’m using the photos from our Fujifilm Instax camera because I think this is a super cute way to display them! I like layering fabrics and paper to frame out the photos, and using clothespins to hang them from the twine. I also picked up some chalkboard tags and a chalkboard pen for a little calligraphy fun. I took a few photos of favorite places around our home, like this quote we have in our dining room. I think it adds a unique touch instead of just having the photos be of our family.
Your options are really endless here! I think is also a cute way to keep track of pregnancy progress, or even to hang in the baby’s room for monthly baby updates! If your frame is large enough, you can make enough space for all 12 months of baby’s first year and write a little bit about each month below the photo. Think of it as a unique baby book, and also display artwork for the nursery!
If you’re an Instax user, I’ve got some tips to keep in mind for taking really great photos!
1. The Instax will actually light up and tell you how much light the camera is sensing. For indoors, it might select the little house icon. For outside, the sun icon. MAKE SURE you turn the DIAL on the camera to match the lit up setting. I didn’t know this at first, and it’s the key to taking a decent photo with the Instax. Do this before taking every photo!
2. If you want to override the setting the camera suggests for you, turn the dial appropriately. For example, if you are shooting indoors and want the photo brighter, turn the dial to a DARKER setting. This will make the camera think the room is darker and will brighten the photo. )If you’re at the darkest setting already, which is the little house, select HI-KEY). Same goes for the opposite. To have the camera let in LESS light, turn it to a BRIGHTER setting. Usually one click up or down will do the trick.
3. If you’re photographing indoors and want to go a bright as you can, HI-KEY is the best option! But don’t do this outside, or your photos will be completely overexposed.
4. Keep in mind the Instax is meant to photograph 2-8 ft away, so anything closer or further might not be in focus.
5. Buy an extra case of film for practice. Over or under exposed photos are bound to happen while you’re getting the hang of it, so have extra on hand! 🙂
If you took part in the live class and are reading this, I just want to personally thank you for your attendance! I truly enjoyed my time with you all, and I was so amazed by your creativity! If you do make a photo frame at home, I would love to see what you come up with! Be sure to tag me on Instagram so I can see it for myself.
To see the other fun projects we created with our Fujifilm Instax camera, check out this DIY memory photo book we did with the kids right here!


Love this, it’s SO cute! Going to make one for my studio, thanks for sharing!!!